blog
blog1
03
Mar

Animals & Birds First Aid

Providing first aid to animals and birds can be crucial in saving their lives and preventing further injury. Here are some general tips on how to administer first aid to animals and birds:

  1. Assess the situation: Before approaching any animal or bird, make sure it is safe to do so. Check for any dangers, such as traffic or other animals that may pose a threat.

  2. Observe the animal's behavior: Take note of any signs of distress, pain, or injuries. Approach the animal slowly and calmly, and avoid making sudden movements or loud noises that could scare it.

  3. Call for help: If the animal is severely injured or you are unsure of how to proceed, call your local animal control agency, wildlife rehabilitation center, or a veterinarian for assistance.

  4. Provide basic first aid: If you feel confident and safe enough to administer first aid, here are some general tips to follow:

  • Keep the animal calm and still: This can help prevent further injuries and reduce stress.
  • Control bleeding: Apply pressure to any wounds that are bleeding.
  • Splint fractures: If you suspect a broken bone, try to immobilize the affected limb with a splint.
  • Provide warmth: Cover the animal with a blanket or towel to help regulate its body temperature.
  • Provide water: If the animal is conscious and alert, offer it water to drink.
  1. Transport the animal safely: Once the animal has been stabilized, transport it to a veterinarian or wildlife rehabilitation center as soon as possible. Place the animal in a secure carrier or box, and make sure it has plenty of ventilation and is not exposed to extreme temperatures.

Remember, providing first aid to animals and birds can be challenging and requires proper training and expertise, and it is important to prioritize your safety and the safety of others around you. If you are unsure of how to proceed or do not feel comfortable providing first aid, seek professional help immediately.

Here are some additional tips on providing first aid to animals and birds:

  1. Check for breathing and pulse: If the animal is unconscious, check for breathing and pulse. If there is no breathing or pulse, perform CPR or rescue breathing if you are trained to do so.

  2. Handle with care: When handling an injured animal or bird, be gentle and avoid rough movements that could cause further harm. Use gloves or other protective gear if necessary.

  3. Be mindful of potential diseases: Some animals and birds may carry diseases that can be transmitted to humans, such as rabies or bird flu. If you are handling an injured wild animal, it is important to take precautions to protect yourself.

  4. Avoid giving food or medication: Unless directed by a veterinarian or wildlife rehabilitator, do not give the animal any food or medication. Some substances can be toxic to animals, and giving them the wrong type of food or medication could make their condition worse.

  5. Document the situation: If possible, take photos or videos of the injured animal and its surroundings. This can be helpful in identifying the species and providing important information to wildlife rehabilitators or veterinarians.

READ MORE
blog1
01
Mar

Water Meter Installation

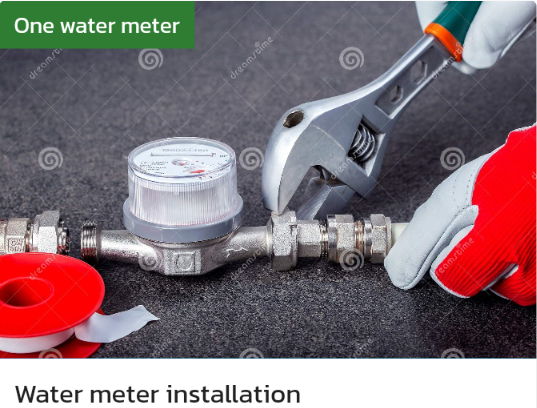
Installing a water meter involves a few steps. Here's a general guide to help you install a water meter:

  1. Locate the water supply line: Locate the main water supply line that enters your property. You will need to install the water meter on this line.

  2. Turn off the water supply: Turn off the water supply at the main valve to prevent water from flowing through the pipes.

  3. Cut the pipe: Use a pipe cutter to cut the water supply line at the location where you want to install the water meter. Make sure that the cut is clean and straight.

  4. Install the meter: Install the water meter in the cut section of the water supply line according to the manufacturer's instructions. Make sure that the meter is installed in the correct orientation.
  5. Connect the water supply line: Connect the water supply line to the inlet side of the water meter. Use appropriate fittings and connectors to make sure that the connection is secure.

  6. Connect the outlet line: Connect the outlet line from the water meter to the rest of the water supply line. Use appropriate fittings and connectors to make sure that the connection is secure.

  7. Turn on the water supply: Turn on the water supply at the main valve to check for any leaks in the connections.
  8. Register the meter: Register the water meter with your local water utility company. They will need to know the serial number and other information about the meter.
That's it! By following these steps, you should be able to install a water meter. If you're not comfortable with plumbing work, it may be best to hire a professional plumber from Locals4u to help with the installation.

READ MORE
blog1
01
Mar

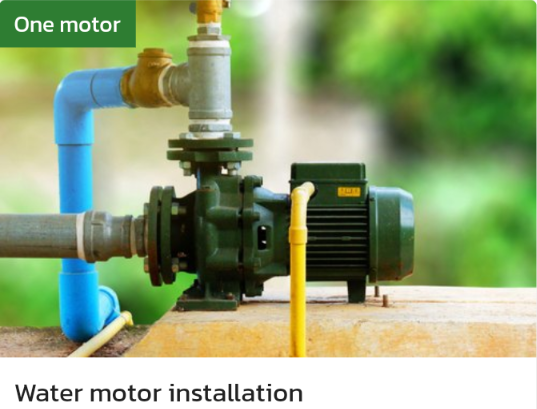
Water Motor Installation

Installing a water motor involves a few steps. Here's a general guide to help you install a water motor:

  1. Choose the location: Select a location that is dry and well-ventilated. The motor should be placed on a flat and stable surface that can support the weight of the motor.

  2. Assemble the pump and motor: Assemble the pump and motor according to the manufacturer's instructions. Make sure that all the connections are tight and secure.

  3. Install the check valve: Install a check valve in the water supply line to prevent backflow. The check valve should be installed between the water source and the pump.

  4. Install the pressure switch: Install a pressure switch that will turn the motor on and off based on the water pressure. The pressure switch should be installed near the water tank or in a location where it can easily sense the water pressure.

  5. Install the pressure gauge: Install a pressure gauge near the pressure switch so that you can monitor the water pressure.

  6. Connect the water supply: Connect the water supply line to the inlet port of the pump. Make sure that the connection is tight and secure.

  7. Connect the discharge line: Connect the discharge line to the outlet port of the pump. Make sure that the connection is tight and secure.

  8. Connect the electrical wiring: Connect the electrical wiring according to the manufacturer's instructions. The motor should be connected to a power supply that is appropriate for the motor's voltage and amperage requirements.

  9. Test the motor: Turn on the power supply and check the motor's operation. Check for any leaks in the water supply or discharge lines.

That's it! By following these steps, you should be able to install a water motor. If you're not comfortable with electrical or plumbing work, it may be best to hire a professional plumber or electrician from Locals4u to help with the installation.

READ MORE
blog1
01
Mar

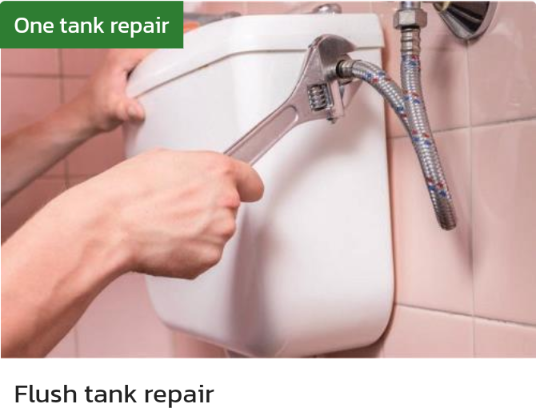
Flush Tank Repair

Repairing a flush tank can involve different steps depending on the specific issue. Here are some common problems and their solutions:

  1. Weak or incomplete flush: If the flush is weak or incomplete, it could be due to a clogged flush valve or a worn-out flapper. To fix this, turn off the water supply valve and flush the toilet to empty the tank. Remove the flush valve and clean it thoroughly with a brush and water. If the flapper is worn out, replace it with a new one.

  2. Constant running water: If you hear a continuous running sound coming from the tank, it could be due to a faulty fill valve or a leaky flapper. To fix this, turn off the water supply valve and remove the tank lid. Adjust the fill valve height to the manufacturer's recommended level, or replace it with a new one. Check the flapper for any leaks or wear and replace it if necessary.

  3. Leaking tank: If you notice water pooling around the base of the tank, it could be due to a cracked or damaged tank. In this case, you will need to replace the tank. Turn off the water supply valve and flush the toilet to empty the tank. Remove the bolts that secure the tank to the bowl and carefully lift the tank off the bowl. Replace the tank with a new one and reattach it to the bowl with the bolts.

  4. Loose or wobbly tank: If the tank is loose or wobbly, it could be due to loose or damaged tank bolts or washers. Turn off the water supply valve and flush the toilet to empty the tank. Tighten the bolts and washers that secure the tank to the bowl. If the bolts or washers are damaged, replace them with new ones.

By following these steps, you should be able to repair a flush tank. However, if you're not comfortable with plumbing work, it may be best to hire a professional plumber from Locals4u to help with the repair.

READ MORE
blog1
01
Mar

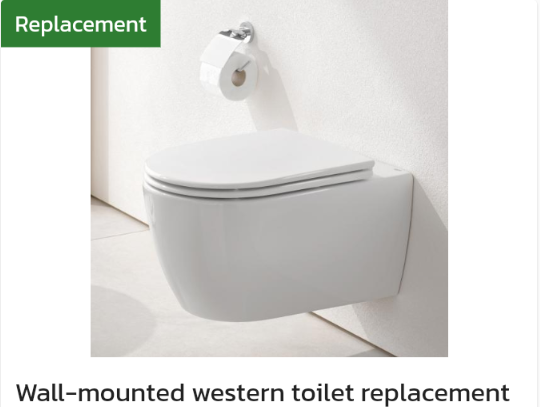
Wall Mounted Western Toilet Replacement

Replacing a wall-mounted western toilet involves a few more steps than replacing a floor-mounted toilet. Here's a general guide to help you replace a wall-mounted western toilet:

  1. Turn off the water supply: Locate the water shut-off valve and turn it off. Flush the toilet to empty the tank and bowl.

  2. Disconnect the water supply: Remove the nuts and washers that secure the water supply line to the inlet valve. Carefully pull the water supply line away from the inlet valve.

  3. Remove the mounting hardware: Locate the bolts that secure the toilet to the wall and remove the nuts and washers. You may need to use a wrench or pliers to remove the nuts.

  4. Remove the toilet: Carefully lift the toilet off the mounting bolts and set it aside. Use a putty knife to scrape off any old caulk or adhesive from the wall and the mounting flange.

  5. Install the new mounting flange: Install the new mounting flange on the wall using the screws and anchors provided with the flange.

  6. Install the new toilet: Carefully position the new toilet onto the mounting bolts, making sure the bolts protrude through the mounting holes in the base of the toilet. Secure the toilet to the wall by hand-tightening the nuts onto the mounting bolts.

  7. Reconnect the water supply: Reconnect the water supply line to the inlet valve, and hand-tighten the nuts and washers.

  8. Test the toilet: Turn on the water supply valve and fill the tank. Flush the toilet a few times to make sure it's working correctly. Check for any leaks around the base of the toilet or the water supply line.

That's it! By following these steps, you should be able to replace a wall-mounted western toilet. If you're not comfortable with plumbing work, it may be best to hire a professional plumber from Locals4u to help with the installation.

READ MORE
blog1
01
Mar

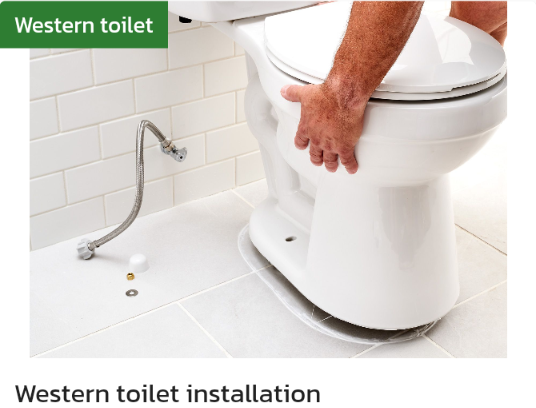
Western Toilet Installation

Installing a western toilet involves a few basic steps. Here's a general guide to help you install a new western toilet:

  1. Remove the old toilet: Before you install the new toilet, you'll need to remove the old one. Turn off the water supply to the toilet, and then flush the toilet to drain as much water as possible. Disconnect the water supply line from the tank and then remove the nuts and bolts that hold the toilet to the floor. Lift the toilet off the floor and set it aside.

  2. Prepare the installation area: Clean the installation area where the old toilet was located, and then inspect the toilet flange. If it's damaged or broken, replace it before you proceed.

  3. Install the wax ring: Place a new wax ring on the flange, making sure the tapered end is facing the toilet bowl.

  4. Install the new toilet: Carefully lower the new toilet onto the wax ring, making sure the bolts in the flange line up with the bolt holes in the base of the toilet. Press down on the toilet to compress the wax ring, and then hand-tighten the nuts onto the bolts. Make sure the toilet is level, and then tighten the nuts using a wrench.

  5. Connect the water supply: Reconnect the water supply line to the tank, hand-tightening the connection. Turn on the water supply valve and check for any leaks.

  6. Test the toilet: Flush the toilet a few times to make sure it's working correctly. Check for any leaks around the base of the toilet or the water supply line.

That's it! By following these steps, you should be able to install a new western toilet.

If you're not comfortable with plumbing work, it may be best to hire a professional plumber from Locals4u to help with the installation.

READ MORE
blog1
01
Mar

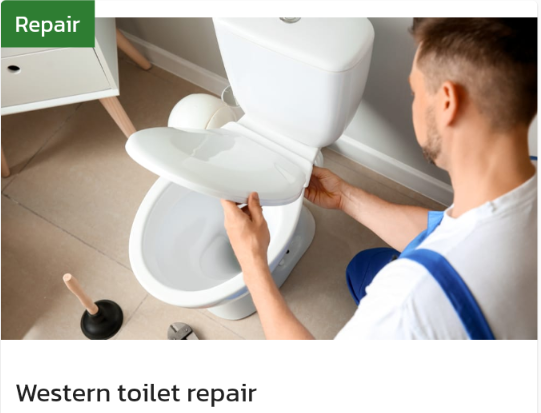
Western Toilet Repair

The specific steps for repairing a western toilet will depend on the problem you're experiencing. Here are some common toilet problems and their potential solutions:

  1. Toilet won't flush: If the toilet won't flush, check the water level in the tank. If the water level is too low, adjust the float valve to raise the water level. If the water level is fine, check the flush lever and chain to make sure they are properly connected and functioning.

  2. Toilet is constantly running: If the toilet is constantly running, check the flapper valve in the bottom of the tank. Make sure it is seated properly and isn't damaged. If the flapper is fine, check the float valve to make sure it isn't stuck.

  3. Toilet is leaking water: If you notice water on the floor around the toilet, check the bolts that hold the toilet to the floor. Tighten them if they are loose. If the bolts are tight, check the wax ring seal between the toilet and the floor. If the wax ring is damaged, it will need to be replaced.

  4. Toilet is clogged: If the toilet is clogged, use a plunger to try to unclog it. If the plunger doesn't work, try using a plumbing snake to clear the blockage.

  5. Toilet bowl is not filling: If the bowl isn't filling with water, check the water level in the tank. If the water level is fine, check the inlet holes around the rim of the bowl to make sure they are not blocked. If they are blocked, use a wire hanger or toothbrush to clean them out.

Remember, if you're not comfortable with plumbing work, it may be best to hire a professional plumber from Locals4u to diagnose and repair your toilet.

READ MORE
blog1
01
Mar

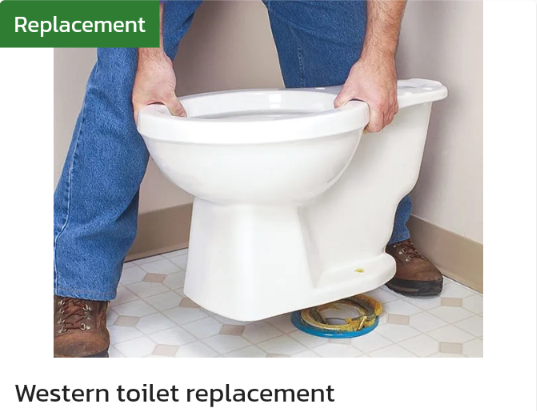
Western Toilet Replacement

Replacing a western toilet is a bit more involved than replacing a toilet seat cover or other small bathroom fixtures. Here are the steps you can follow to replace a western toilet:

  1. Turn off the water supply: Locate the shut-off valve for the water supply to the toilet and turn it off by turning the valve clockwise.

  2. Remove the old toilet: Disconnect the water supply line from the bottom of the tank, either by unscrewing it or by using pliers to loosen the nut. Use a wrench to remove the nuts and washers holding the toilet to the floor. Carefully lift the toilet off the floor and place it aside.

  3. Prepare the area: Clean the area where the old toilet was located and remove any old wax or sealant from the drain hole.

  4. Install the new toilet: Place the new wax seal on the drain hole, making sure it is centered and flat. Carefully place the new toilet onto the wax seal, making sure the bolt holes in the base of the toilet line up with the holes in the flange. Insert the bolts into the flange and through the holes in the base of the toilet. Use new nuts and washers to attach the toilet to the floor. Tighten the nuts until the toilet is secure, but be careful not to over-tighten them and crack the porcelain.

  5. Reconnect the water supply line: Connect the water supply line to the bottom of the tank, either by hand-tightening it or by using pliers to tighten the nut. Make sure the hose is securely attached to the tank.

  6. Turn on the water supply: Turn on the shut-off valve to restore the water supply to the toilet. Check for leaks around the base of the toilet and the water supply line.

  7. Test the flush: Flush the toilet a few times to ensure that it is functioning properly and that there are no leaks.

That's it! Replacing a western toilet can be a bit of a challenge, but by following these steps and being careful during the process, you can successfully replace your old toilet with a new one. If you're not comfortable with plumbing work, it may be best to hire a professional from Locals4u for assistance.

READ MORE
blog1
01
Mar

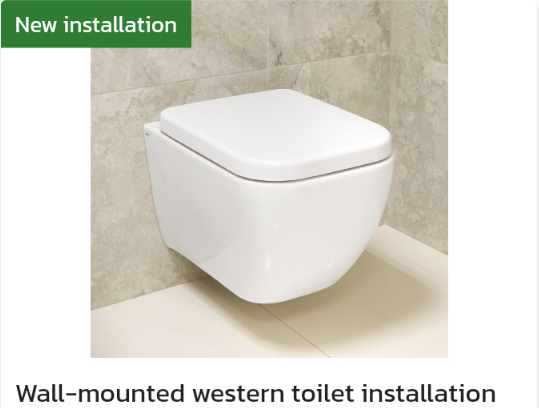
Wall Mounted Western Toilet Installation

Installing a wall-mounted western toilet requires a bit of plumbing work and carpentry, so it's a good idea to have a professional plumber and carpenter do the installation. However, if you're comfortable with basic plumbing and carpentry work, here are the steps you can follow:

  1. Prepare the site: Clear the area where the toilet will be installed and make sure the plumbing and drainage connections are in place. Mark the height where the toilet bowl will be mounted on the wall.

  2. Install the wall-mounted frame: The wall-mounted frame is a metal frame that attaches to the wall and supports the toilet bowl. Follow the manufacturer's instructions to install the frame onto the wall, making sure it is level.

  3. Connect the plumbing: Connect the plumbing to the frame, including the water supply line and the waste pipe. Follow the manufacturer's instructions for the specific frame and toilet model you are installing.

  4. Install the toilet bowl: Mount the toilet bowl onto the frame, making sure it is level and secure. Connect the bolts and nuts to the frame and tighten them.

  5. Install the cistern: The cistern is the tank that holds the water used for flushing. Mount the cistern onto the frame and connect it to the water supply line. Follow the manufacturer's instructions for the specific frame and toilet model you are installing.

  6. Install the seat: Attach the seat to the toilet bowl, following the manufacturer's instructions.

  7. Test the toilet: Turn on the water supply and flush the toilet several times to ensure that it is working properly and that there are no leaks.

That's it! Installing a wall-mounted western toilet can be a bit of a challenge, but by following these steps and being careful during the process, you can successfully install your new toilet. Again, it may be best to hire a professional plumber and carpenter from Locals4u to do the installation if you're not comfortable with plumbing and carpentry work.

READ MORE
blog1
01
Mar

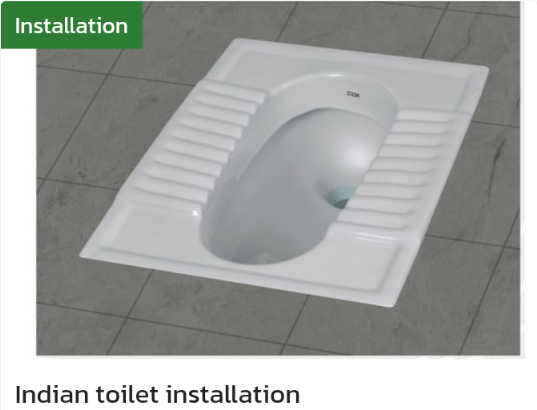
Indian Toilet Installation

Installing an Indian toilet requires a bit of plumbing work, so it's a good idea to have a professional plumber do the installation. However, if you're comfortable with basic plumbing work, here are the steps you can follow:

  1. Prepare the site: Clear the area where the toilet will be installed and make sure the plumbing and drainage connections are in place. Make sure the floor is level and free of any debris.

  2. Install the flange: The flange is a fitting that connects the toilet to the drain pipe. Place the flange over the drain pipe and secure it to the floor with screws or bolts.

  3. Install the toilet bowl: Place the toilet bowl over the flange, lining up the bolt holes in the bowl with the holes in the flange. Insert the bolts through the holes and tighten the nuts onto the bolts.

  4. Install the cistern: The cistern is the tank that holds the water used for flushing. Place the cistern onto the toilet bowl and attach it using the bolts and nuts provided. Connect the water supply line to the cistern.

  5. Install the seat: Attach the seat to the toilet bowl, following the manufacturer's instructions.

  6. Test the toilet: Turn on the water supply and flush the toilet several times to ensure that it is working properly and that there are no leaks.

That's it! Installing an Indian toilet can be a bit of a challenge, but by following these steps and being careful during the process, you can successfully install your new toilet. Again, it may be best to hire a professional plumber from Locals4u to do the installation if you're not comfortable with plumbing work.

READ MORE
blog1
01
Mar

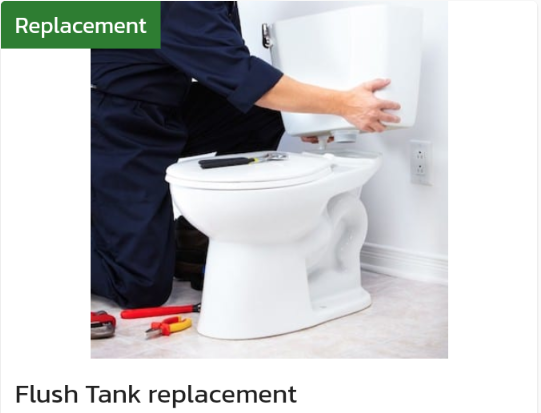
Flush Tank Replacement

Replacing a flush tank is a bit more involved than replacing a toilet seat cover or other small bathroom fixtures. Here are the steps you can follow to replace a flush tank:

  1. Turn off the water supply: Locate the shut-off valve for the water supply to the toilet and turn it off by turning the valve clockwise.

  2. Remove the old flush tank: Disconnect the water supply hose from the bottom of the tank, either by unscrewing it or by using pliers to loosen the nut. Remove the nuts and washers holding the tank to the bowl, and lift the tank off the bowl carefully.

  3. Install the new flush tank: Place the new flush tank onto the bowl, ensuring that the bolt holes in the tank line up with the holes in the bowl. Use new nuts and washers to attach the tank to the bowl. Tighten the nuts until the tank is secure, but be careful not to over-tighten them and crack the porcelain.

  4. Reconnect the water supply hose: Connect the water supply hose to the bottom of the tank, either by hand-tightening it or by using pliers to tighten the nut. Make sure the hose is securely attached to the tank.

  5. Turn on the water supply: Turn on the shut-off valve to restore the water supply to the toilet. Check for leaks around the tank and the water supply hose.

  6. Test the flush: Flush the toilet a few times to ensure that the tank is functioning properly and that there are no leaks.

That's it! Replacing a flush tank can be a bit of a challenge, but by following these steps and being careful during the process, you can successfully replace your old flush tank with a new one. if you are not experienced in Replacing a flush tank, it may be best to hire a professional from Locals4u for assistance.

READ MORE
blog1
01
Mar

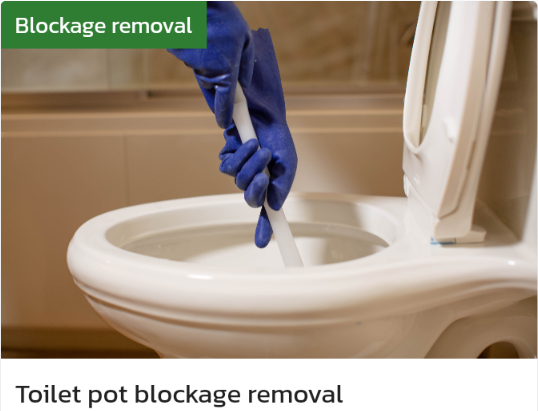
Toilet Pot Blockage Removal

If you're experiencing a blocked toilet, there are several methods you can try to remove the blockage. Here are some steps you can follow:

  1. Use a plunger: The first thing you can try is using a plunger to remove the blockage. Make sure there's enough water in the bowl to cover the plunger head, and create a seal by pressing the plunger down over the drain hole. Push and pull the plunger vigorously several times to create suction and force the blockage out.

  2. Use a toilet auger: If the plunger doesn't work, you can try using a toilet auger (also known as a plumbing snake). Insert the auger into the toilet bowl and twist the handle, feeding the auger through the drain. When you feel resistance, rotate the auger handle to break up the blockage.

  3. Use a chemical drain cleaner: If the plunger and auger don't work, you can try using a chemical drain cleaner. Follow the manufacturer's instructions carefully, and wear gloves and eye protection to avoid contact with the chemicals.

  4. Call a plumber: If none of these methods work, or if you're uncomfortable attempting to fix the problem yourself, it's time to call a plumber from Locals4u. A professional plumber can use specialized tools and techniques to remove the blockage and prevent future issues.

Remember to avoid flushing anything other than toilet paper down the toilet to prevent blockages from occurring in the first place. This includes wipes, feminine hygiene products, and other materials that can cause clogs in the drain. it may be best to hire a professional from Locals4u for assistance.

READ MORE
blog1
01
Mar

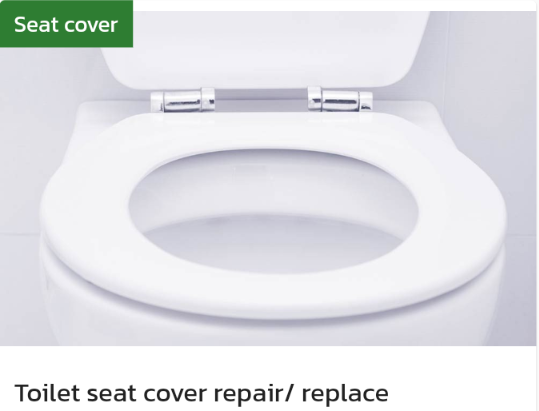
Toilet Seat Cover Repair Or Replace

Installing or replacing a toilet seat cover is a relatively simple task that can be done in a few easy steps:

  1. Gather your supplies: You'll need a new toilet seat cover and the necessary tools for the job, such as a screwdriver and pliers.

  2. Remove the old toilet seat cover: To remove the old toilet seat cover, locate the two bolts at the back of the toilet seat that attach it to the bowl. Using a screwdriver, unscrew the bolts. You may need to hold the nuts in place with pliers while you unscrew the bolts.

  3. Install the new toilet seat cover: Position the new toilet seat cover over the bowl, lining up the bolt holes. Insert the bolts through the holes in the cover and through the holes in the bowl. Screw the nuts onto the bolts, tightening them by hand.

  4. Tighten the bolts: Once the nuts are tightened by hand, use a screwdriver and pliers to tighten them further. Be careful not to over-tighten the bolts, as this can cause damage to the toilet bowl.

  5. Test the new toilet seat cover: Sit on the toilet seat and test it to ensure it is secure and comfortable.

That's it! Installing or replacing a toilet seat cover is a quick and easy DIY task that can make a big difference in the appearance and functionality of your bathroom. if you are not experienced in Toilet seat cover repair or replace, it may be best to hire a professional from Locals4u for assistance.

READ MORE
blog1
01
Mar

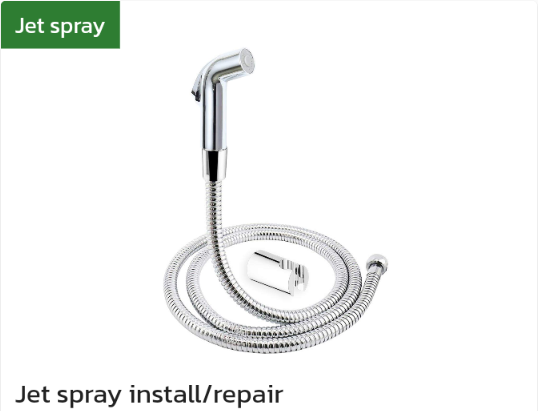
Jet Spray Installation Or Repair

Installing or repairing a jet spray (also known as a bidet spray or hand-held sprayer) typically involves the following steps:

  1. Turn off the water supply: Before you start any plumbing work, turn off the water supply to the area you'll be working in. Locate the shut-off valve, which is usually located under the sink or toilet. Turn it clockwise to shut off the water.

  2. Remove the old jet spray: If you're replacing an old jet spray, unscrew the hose from the bottom of the spray and remove it from the holder.

  3. Install the new jet spray: Take the new jet spray and insert it into the holder. If necessary, use a wrench to tighten it in place. Then, attach the hose to the bottom of the spray and hand-tighten it.

  4. Turn the water supply back on: Once the new jet spray is installed, turn the water supply back on by turning the shut-off valve counterclockwise. Test the jet spray to make sure it's working properly.

Repairing a jet spray may involve checking the hose for leaks or replacing the gasket inside the spray. If the hose is leaking, turn off the water supply and unscrew the hose from the bottom of the spray. Check the hose for any damage or wear, and replace it if necessary. If the gasket inside the spray is damaged, you may need to take the spray apart and replace the gasket. If you're not comfortable doing this, it may be best to hire a professional from Locals4u to handle the repair.

READ MORE
blog1
01
Mar

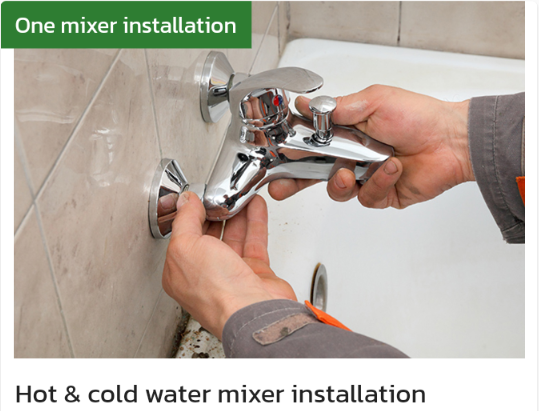
Hot & Cold Water Mixer Installation

To install a hot and cold water mixer, you can follow these general steps:

  1. Turn off the water supply to the area where you will be installing the mixer. This may involve turning off the main water supply to your home or simply turning off the shut-off valves located near the area.
  2. Determine the correct location for the mixer. This will depend on the specific layout and design of your plumbing system, as well as any other fixtures or appliances in the area.
  3. Install any necessary plumbing connections. This may involve installing additional pipes or fittings to connect the mixer to the existing plumbing system.
  4. Attach the mixer to the plumbing connections. This may involve using wrenches or pliers to tighten any nuts or bolts that hold the mixer in place.
  5. Install any necessary mounting brackets or hardware. This may involve drilling holes in the wall or other surface where the mixer will be mounted.
  6. Connect the hot and cold water supply lines to the appropriate inlets on the mixer. This may involve using wrenches or pliers to tighten any nuts or fittings that secure the supply lines to the mixer.
  7. Test the mixer to make sure it is working properly. Turn on the water and check for any leaks or issues with the water pressure or temperature.
  8. Make any necessary adjustments to the mixer. This may involve adjusting the flow rate or temperature using the controls on the mixer.

It is important to choose the appropriate hot and cold water mixer for your needs and follow the manufacturer's instructions carefully when installing it. If you are unsure about any aspect of the installation process, it may be best to hire a professional from Locals4u for assistance or other professional.

READ MORE
blog1
01
Mar

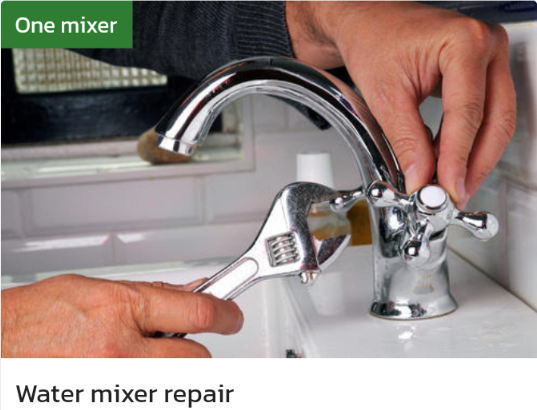
Water Mixer Repair

To repair a water mixer, you can follow these general steps:

  1. Turn off the water supply to the mixer. This may involve turning off the main water supply to your home or simply turning off the shut-off valve located near the mixer.
  2. Remove any decorative or protective covers from the mixer. This may involve using a screwdriver or pliers to remove screws or clips.
  3. Use a wrench or pliers to remove the mixer handle. This will give you access to the cartridge or valve inside the mixer.
  4. Inspect the cartridge or valve for damage or wear. This may involve taking the cartridge or valve apart and examining each component for signs of wear, corrosion, or damage.
  5. Replace any damaged or worn components. This may involve purchasing replacement parts from a hardware or plumbing supply store and following the manufacturer's instructions for installing them.
  6. Reassemble the mixer. This may involve reversing the steps you took to disassemble the mixer and using a wrench or pliers to tighten any screws or clips.
  7. Test the mixer to make sure it is working properly. Turn on the water and check for any leaks or issues with the water pressure or temperature.

It is important to take appropriate safety precautions when attempting to repair a water mixer, such as wearing gloves and eye protection. If you are unsure about any aspect of the process, it is recommended to seek assistance from a qualified plumber or other professional. Additionally, if the damage or wear to the mixer is severe, it may be best to hire a professional from Locals4u to fully repair or replace the mixer.

READ MORE
blog1
01
Mar

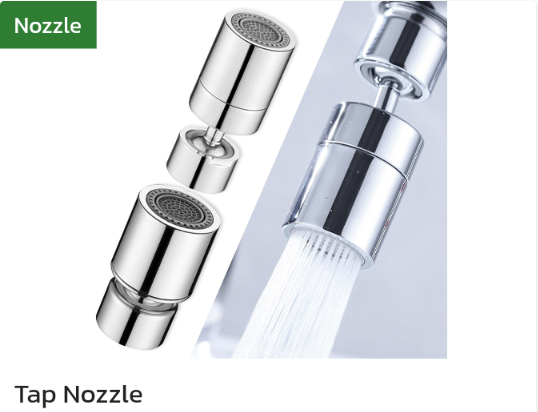
Tap Nozzle

To install a tap nozzle, you can follow these general steps:

  1. Turn off the water supply to the tap. This may involve turning off the main water supply to your home or simply turning off the shut-off valve located near the tap.
  2. Remove the old tap nozzle (if applicable). This may involve unscrewing the old nozzle or using pliers to gently pry it off.
  3. Clean the tap spout thoroughly. This will ensure that the new nozzle sits flush and does not leak.
  4. Choose the appropriate tap nozzle for your needs. This will depend on the size and shape of your tap spout, as well as the purpose of the nozzle (e.g. to conserve water or to provide a different spray pattern).
  5. Attach the new tap nozzle to the spout. This may involve screwing it on by hand or using pliers to tighten it.
  6. Test the tap nozzle to make sure it is working properly. Turn on the water and check for any leaks or issues with the water pressure or temperature.
  7. Make any necessary adjustments to the nozzle. This may involve adjusting the flow rate or spray pattern using the controls on the nozzle.

It is important to choose the appropriate tap nozzle for your needs and follow the manufacturer's instructions carefully when installing it. If you are unsure about any aspect of the installation process, it may be best to hire a professional from Locals4u for assistance.

READ MORE
blog1
01
Mar

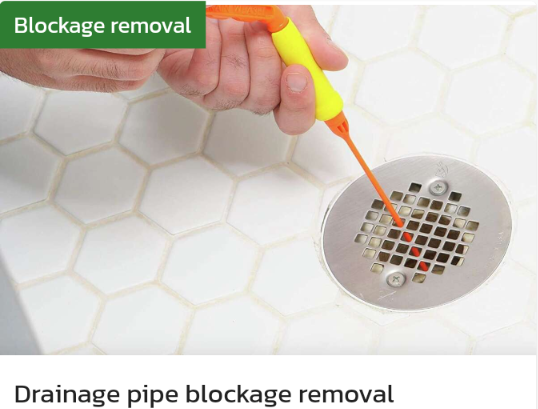
Drainage Pipe Blockage Removal

To remove a drainage pipe blockage, you can follow these general steps:

  1. Locate the blockage. This may involve using a flashlight to look inside the drain or using a plumbing snake or auger to probe the drain and feel for the blockage.
  2. Clear the blockage. Depending on the type and severity of the blockage, there are several methods you can try:
  • Plunger: Use a plunger to create suction and force the blockage through the drain.
  • Plumbing snake or auger: Insert the snake or auger into the drain and rotate it to break up the blockage or pull it out.
  • Chemical drain cleaner: Pour a commercial drain cleaner into the drain and wait for it to dissolve the blockage.
  • Boiling water: Pour boiling water down the drain to dissolve grease or other substances that may be causing the blockage.
  1. Test the drain to make sure it is flowing freely. Turn on the water and check for any signs of slow drainage or backup.

It is important to take appropriate safety precautions when attempting to remove a drainage pipe blockage, such as wearing gloves and eye protection. If you are unsure about any aspect of the process, it may be best to hire a professional from Locals4u for assistance. Additionally, if the blockage persists or is particularly severe, it may require professional assistance to fully clear the blockage.

READ MORE
blog1
01
Mar

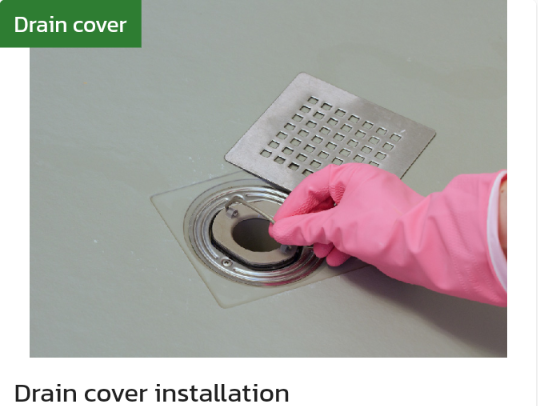
Drain Cover Installation

To install a drain cover, you can follow these general steps:

  1. Clean the drain area thoroughly. This will ensure that the drain cover sits flush with the drain and does not get clogged with debris.
  2. Choose the appropriate drain cover for your needs. This will depend on the size and shape of your drain, as well as the purpose of the drain cover (e.g. to prevent clogs or to provide a decorative touch).
  3. Place the drain cover over the drain. Make sure it sits flush with the surface and covers the entire drain opening.
  4. Secure the drain cover in place. This may involve tightening screws or clips, depending on the type of drain cover you are using. Follow the manufacturer's instructions for securing the drain cover.
  5. Test the drain cover to make sure it is securely in place and does not move or shift when pressure is applied.

It is important to choose the appropriate drain cover for your needs and follow the manufacturer's instructions carefully when installing it. If you are unsure about any aspect of the installation process, it may be best to hire a professional from Locals4u for assistance.

READ MORE
blog1
01
Mar

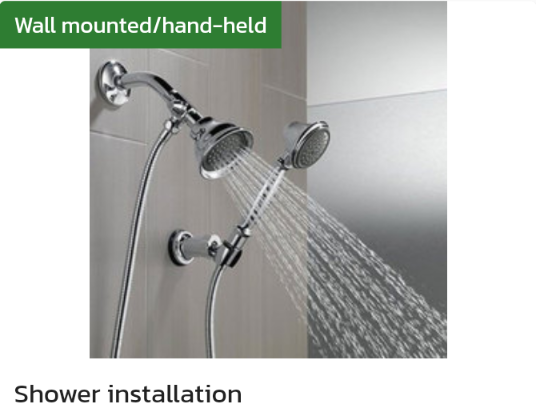
Shower Installation

To install a shower, you can follow these general steps:

  1. Choose a suitable location for the shower. This should be an area that is easily accessible and has appropriate water supply and drainage.
  2. Determine the type of shower you want to install. This could be a standard showerhead attached to the wall, a handheld showerhead, or a combination of both.
  3. Install the necessary plumbing. This will involve running pipes and connecting them to the water supply and drainage system. If you are unsure about this step, it is recommended to seek assistance from a qualified plumber.
  4. Install the shower pan or base. This will provide a waterproof surface for the shower and ensure proper drainage. Follow the manufacturer's instructions for installing the pan or base.
  5. Install the shower walls or enclosure. This will provide a structure for the shower and prevent water from leaking out. This could be a pre-fabricated enclosure or individual tiles. Follow the manufacturer's instructions for installing the walls or enclosure.
  6. Install the showerhead and controls. This will involve attaching the showerhead to the wall or ceiling and installing the controls for turning the water on and adjusting the temperature.
  7. Test the shower to make sure it is working properly. Turn on the water and check for any leaks or issues with the water pressure or temperature.
  8. Apply any finishing touches, such as sealing gaps or adding grout to the tiles.

It is important to follow the manufacturer's instructions carefully and take appropriate safety precautions when installing a shower. If you are unsure about any aspect of the installation process, it may be best to hire a professional from Locals4u for assistance.

READ MORE
blog1
01
Mar

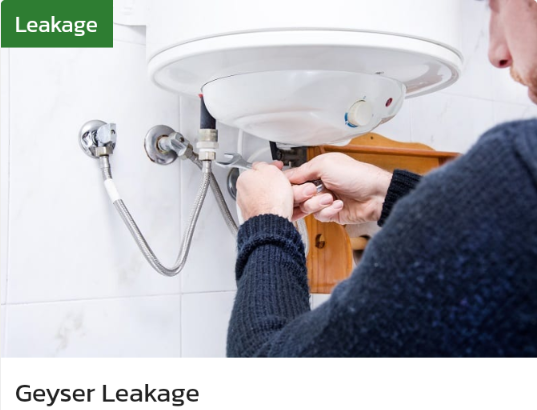
Geyser Leakage

To repair a geyser leakage, you can follow these general steps:

  1. Turn off the power supply to the geyser. If the geyser is an electric one, turn off the circuit breaker or switch. If it is a gas geyser, turn off the gas supply.
  2. Turn off the water supply to the geyser. This can usually be done by turning a valve located near the geyser.
  3. Drain the geyser. This will involve attaching a hose to the drain valve and allowing the water to flow out of the geyser until it is empty.
  4. Locate the source of the leakage. Inspect the geyser to determine where the leak is coming from. Common areas where leaks occur include the inlet and outlet pipes, the pressure relief valve, and the tank itself.
  5. If the leak is caused by a loose fitting or joint, tighten the nuts or bolts to secure the connection. Use a wrench or pliers to tighten the nuts, being careful not to overtighten and cause damage to the pipes or fittings.
  6. If the leak is caused by a damaged sealant or gasket, remove the old sealant or gasket and clean the area thoroughly. Apply a new layer of sealant or replace the gasket, making sure it is the appropriate size and type for the geyser and connection.
  7. If the leak is caused by a damaged pressure relief valve, it may need to be replaced. This will involve turning off the water supply and draining the geyser. Remove the old valve and install a new one, following the manufacturer's instructions.
  8. Once the repair has been made, turn the water supply and power supply back on and check for any leaks. If there are still signs of leakage, turn off the water and power supply and repeat the repair process until the geyser is completely sealed and the leak is stopped.

It is important to take appropriate safety precautions when attempting to repair a geyser leakage. If you are unsure about any aspect of the process or the damage to the geyser is severe, it may be best to hire a professional from Locals4u for assistance.

READ MORE
blog1
01
Mar

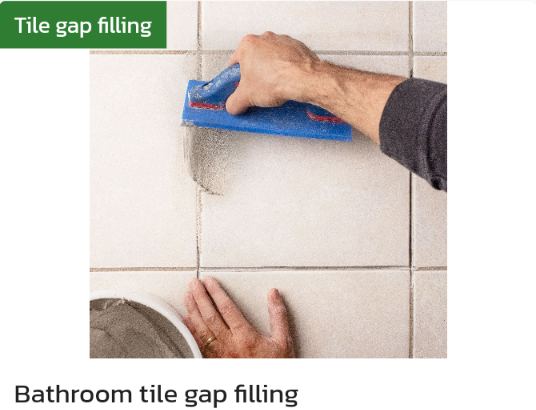
Bathroom Tile Gap Filling

To fill tile gaps in a bathroom, you can follow these general steps:

  1. Clean the tile gap thoroughly using a brush or vacuum to remove any debris or dust.
  2. Choose an appropriate filler material. This will depend on the size of the gap and the surrounding tiles. Common filler materials include grout, caulk or epoxy.
  3. Mix the filler material according to the manufacturer's instructions. This may involve adding water or a catalyst to activate the material.
  4. Apply the filler material to the gap using a putty knife or similar tool. Make sure the gap is completely filled and level with the surrounding tiles.
  5. Smooth the surface of the filler material using a damp sponge or cloth. This will help to create a clean, even finish and remove any excess material.
  6. Allow the filler material to dry or cure completely. This may take several hours or days depending on the material used.
  7. Once the filler material is completely dry or cured, clean the tiles and surrounding area to remove any residue or excess material.

It is important to choose an appropriate filler material and follow the manufacturer's instructions carefully when filling tile gaps in a bathroom. If the tiles are severely damaged or the gap is too large, it may be best to hire a professional from Locals4u for assistance.

READ MORE
blog1
01
Mar

Kitchen Tile Gap Filling

To fill tile gaps in a kitchen, you can follow these general steps:

  1. Clean the tile gap thoroughly using a brush or vacuum to remove any debris or dust.
  2. Choose an appropriate filler material. This will depend on the size of the gap and the surrounding tiles. Common filler materials include grout, caulk or epoxy.
  3. Mix the filler material according to the manufacturer's instructions. This may involve adding water or a catalyst to activate the material.
  4. Apply the filler material to the gap using a putty knife or similar tool. Make sure the gap is completely filled and level with the surrounding tiles.
  5. Smooth the surface of the filler material using a damp sponge or cloth. This will help to create a clean, even finish and remove any excess material.
  6. Allow the filler material to dry or cure completely. This may take several hours or days depending on the material used.
  7. Once the filler material is completely dry or cured, clean the tiles and surrounding area to remove any residue or excess material.

It is important to choose an appropriate filler material and follow the manufacturer's instructions carefully when filling tile gaps in a kitchen. If you are unsure about any aspect of the process or the tiles are severely damaged, it may be best to hire a professional from Locals4u for assistance.

READ MORE
blog1
01
Mar

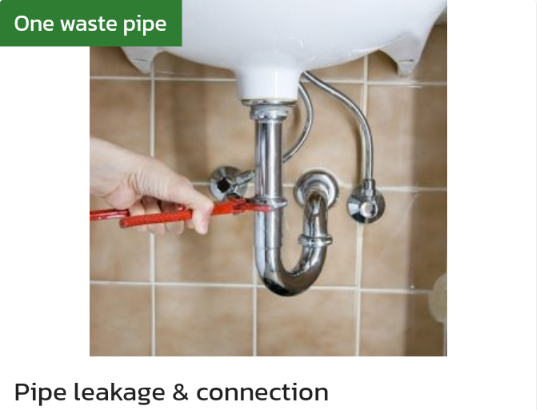
Pipe Leakage & Connection

To repair a waste pipe leakage, you can follow these general steps:

  1. Turn off the water supply to the affected area to prevent any further leakage.
  2. Locate the source of the leakage. Inspect the waste pipe to determine where the leak is coming from.
  3. If the leak is caused by a loose fitting or joint, tighten the nuts or bolts to secure the connection. Use a wrench or pliers to tighten the nuts, being careful not to overtighten and cause damage to the pipes.
  4. If the leak is caused by a crack or hole in the pipe, use a pipe cutter or hacksaw to cut out the damaged section of the pipe. Cut a new section of pipe to fit the gap and join the new section to the existing pipe using appropriate fittings, such as couplings, elbows or tees. Follow the manufacturer's instructions for fitting the new section and make sure all connections are secure.
  5. If the leak is caused by a damaged sealant or gasket, remove the old sealant or gasket and clean the area thoroughly. Apply a new layer of sealant or replace the gasket, making sure it is the appropriate size and type for the pipe and connection.
  6. Turn on the water supply and check for any leaks. If there are still signs of leakage, turn off the water supply and repeat the repair process until the pipe is completely sealed and the leak is stopped.

It is important to take appropriate safety precautions when attempting to repair a waste pipe leakage. If you are unsure about any aspect of the process or the damage to the pipe is severe, it may be best to hire a professional from Locals4u for assistance.

READ MORE
blog1
01
Mar

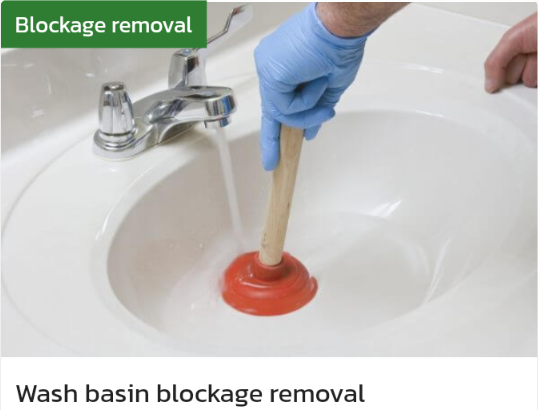
Wash Basin Blockage Removal

To remove a washbasin blockage, you can follow these general steps:

  1. Turn off the water supply to the washbasin to prevent any further water flow.
  2. Clear any debris or hair from the sink drain using a pair of gloves or tweezers.
  3. If the blockage is still present, try using a plunger to remove the clog. Fill the sink with enough water to cover the rubber part of the plunger. Position the plunger over the drain and push down and pull up repeatedly until the clog is dislodged.
  4. If the plunger does not work, try using a plumbing snake or auger to remove the clog. Insert the snake or auger into the drain and turn it clockwise until you reach the blockage. Use a back-and-forth motion to break up the clog and remove it.
  5. If the blockage is still present, you may need to remove the sink trap. Place a bucket under the sink to catch any water or debris. Use a wrench or pliers to loosen the nuts holding the trap in place. Remove the trap and clean it thoroughly. Reinstall the trap and tighten the nuts securely.
  6. Turn on the water supply to the washbasin and test the sink to ensure it is draining properly.

It is important to wear gloves and take appropriate safety precautions when attempting to remove a washbasin blockage. If you are unable to remove the blockage or are unsure about any aspect of the process, it may be best to hire a professional from Locals4u for assistance.

READ MORE
blog1
01
Mar

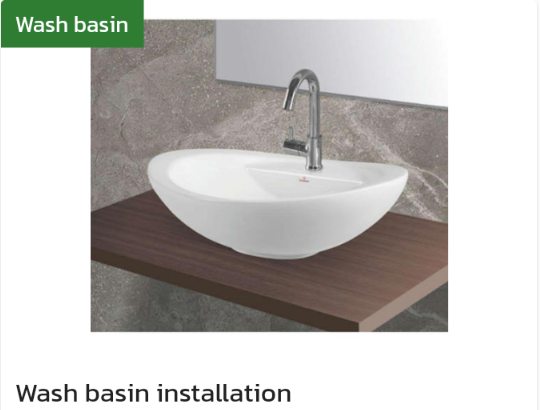
Wash Basin Installation

To install a washbasin, you can follow these general steps:

  1. Choose the location for the washbasin. Make sure there is enough space for the basin and that the plumbing is easily accessible.
  2. Install the faucet on the washbasin, following the manufacturer's instructions. Make sure the faucet is securely attached to the basin.
  3. Install the drain assembly on the basin, following the manufacturer's instructions. Make sure the drain assembly is securely attached to the basin.
  4. Install the mounting hardware on the wall or countertop where the washbasin will be placed, following the manufacturer's instructions. Make sure the mounting hardware is level and securely attached.
  5. Place the washbasin on the mounting hardware, making sure it is level and centered.
  6. Connect the drain assembly to the plumbing using appropriate pipes and fittings. Make sure the connections are tight and secure.
  7. Connect the water supply to the faucet using appropriate pipes and fittings. Make sure the connections are tight and secure.
  8. Test the washbasin to make sure it is working correctly. This may involve checking the water flow and drainage.

It is important to read the manufacturer's instructions carefully and follow all safety precautions when installing a washbasin. If you are unsure about any aspect of the installation process, it may be best to hire a professional from Locals4u for assistance. It is also important to periodically check and maintain the washbasin to ensure it is working correctly and to repair or replace it if it is damaged or worn.

READ MORE
blog1
01
Mar

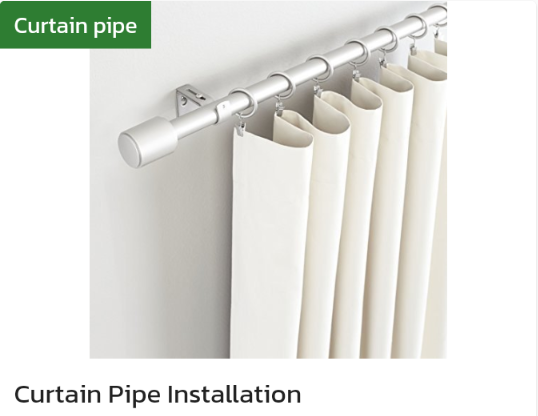
Curtain Pipe Installation

To install a curtain pipe, you can follow these general steps:

  1. Measure the width of the window or opening where you want to install the curtain pipe. This will help you choose the appropriate size of the curtain pipe.
  2. Choose the type of curtain pipe you want to use, such as a single rod, double rod, or tension rod. You may also need to choose the appropriate mounting hardware, such as brackets or screws.
  3. Install the mounting hardware on the wall or window frame, following the manufacturer's instructions. Make sure the mounting hardware is level and secure.
  4. Attach the curtain rings or hooks to the curtain panel or panels, if necessary.
  5. Insert the curtain pipe into the rings or hooks on the curtain panel or panels.
  6. Place the curtain pipe onto the mounting brackets or screws, making sure it is level and centered.
  7. Secure the curtain pipe to the mounting hardware using appropriate screws or clips, following the manufacturer's instructions.
  8. Adjust the curtain panel or panels as necessary to ensure they are straight and hang evenly.

It is important to read the manufacturer's instructions carefully and follow all safety precautions when installing a curtain pipe. If you are unsure about any aspect of the installation process, it may be best to hire a professional from Locals4u for assistance.

READ MORE
blog1
01
Mar

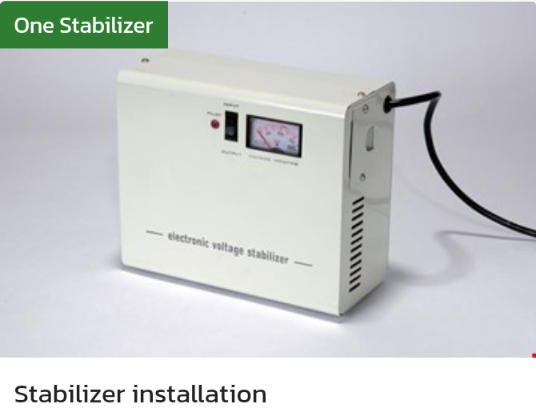
Stabilizer Installation

To install a stabilizer, you can follow these general steps:

  1. Choose the location for the stabilizer. Make sure it is well-ventilated and has enough space to operate.
  2. Mount the stabilizer on a stable and level surface, such as a wall or a mounting bracket. Use appropriate screws and anchors to secure the stabilizer to the surface.
  3. Turn off the power supply to the equipment or appliances that will be connected to the stabilizer.
  4. Connect the input of the stabilizer to the AC mains using an appropriate cable. Make sure the voltage and frequency of the mains supply are compatible with the stabilizer's specifications.
  5. Connect the output of the stabilizer to the equipment or appliances using appropriate cables. Make sure the load is within the stabilizer's power rating.
  6. Turn on the power supply to the equipment or appliances and the stabilizer.
  7. Follow the manufacturer's instructions to calibrate the stabilizer. This may involve adjusting the output voltage or setting the sensitivity level.
  8. Test the stabilizer to make sure it is working correctly. This may involve checking the output voltage and frequency under different load conditions.

It is important to read the manufacturer's instructions carefully and follow all safety precautions when installing a stabilizer. If you are unsure about any aspect of the installation process, it may be best to hire a professional from Locals4u for assistance. It is also important to periodically check and maintain the stabilizer to ensure it is working correctly and to replace it if it is damaged or worn.

READ MORE
blog1
01
Mar

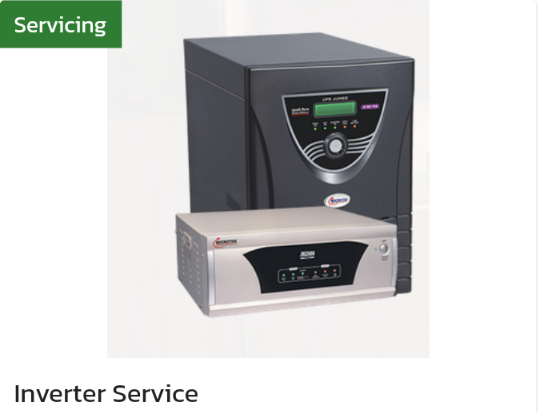
Inverter Service

To service an inverter, you can follow these general steps:

  1. Turn off the inverter and unplug it from the power source to prevent electric shock or injury.
  2. Remove the cover of the inverter. This may involve removing screws or other fasteners.
  3. Check for any visible signs of damage or wear, such as burned components or loose connections.
  4. Clean the internal components of the inverter with a soft brush or compressed air to remove any dust or debris.
  5. Check the battery bank and cables for any signs of damage or wear. Make sure the connections are tight and secure.
  6. Check the AC load and cables for any signs of damage or wear. Make sure the load is within the inverter's power rating.
  7. Use a multimeter to check the voltage and current of the battery bank and AC load to ensure they are within the inverter's specifications.
  8. Test the inverter to make sure it is working correctly. This may involve connecting a load to the inverter's output and checking the output voltage and frequency.
  9. Replace any damaged or worn components as necessary. This may involve soldering or replacing circuit boards or other components.
  10. Reassemble the inverter and test it again to make sure it is working correctly.

If you are not familiar with electronics or are unsure about any aspect of servicing an inverter, it may be best to hire a professional from Locals4u for assistance or contact the manufacturer's customer support for further assistance. It is also important to read the manufacturer's instructions carefully and follow all safety precautions when servicing an inverter.

READ MORE
blog1
01
Mar

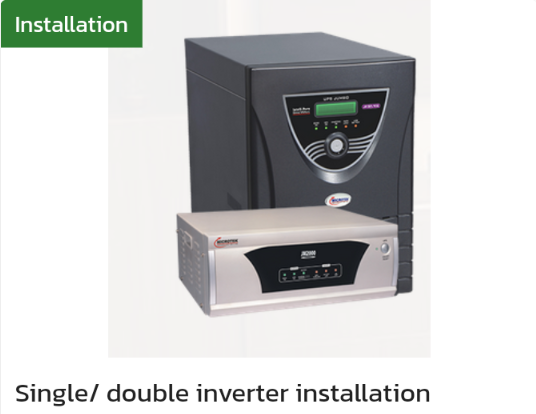
Single Or Double Inverter Installation

Installing a single or double inverter involves a similar process. Here are the general steps:

  1. Choose the location for the inverter. Make sure it is well-ventilated and has enough space to operate.
  2. Mount the inverter on a stable and level surface, such as a wall or a mounting bracket. Use appropriate screws and anchors to secure the inverter to the surface.
  3. Connect the inverter to the battery bank. Connect the positive cable from the battery bank to the positive terminal of the inverter and the negative cable to the negative terminal.
  4. Connect the inverter to the AC load. Connect the AC load to the inverter's output terminals using appropriate cables. Make sure the load is within the inverter's power rating.
  5. Connect the inverter to the AC input. If the inverter has a built-in AC charger, connect the AC input to the inverter's input terminals using an appropriate cable.
  6. Turn on the inverter and follow the manufacturer's instructions to complete the setup process. This may involve configuring the inverter's settings, such as the battery type, charging current, and output frequency.

If you are installing a double inverter, the process is similar, except that you will need to connect both inverters to the battery bank and AC load. The two inverters should be connected in parallel to increase the power output. It is important to ensure that the cables and connectors used are rated for the combined power output of the inverters.

It is important to read the manufacturer's instructions carefully and follow all safety precautions when installing an inverter. If you are unsure about any aspect of the installation process, it may be best to hire a professional from Locals4u for assistance.


READ MORE
blog1
01
Mar

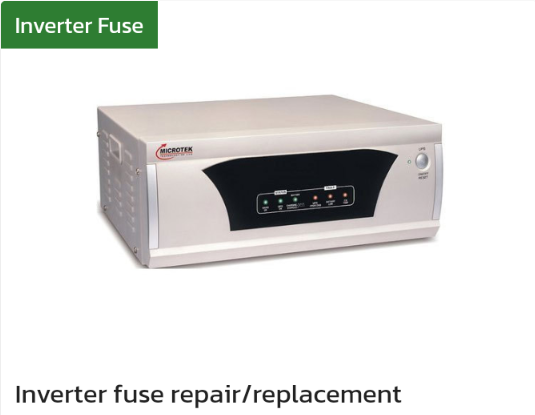
Inverter Fuse Repair Or Replacement

Repairing or replacing an inverter fuse can be done by following these steps:

  1. Turn off the inverter and unplug it from the power source to prevent electric shock or injury.
  2. Locate the inverter fuse. It is usually located near the power input or output terminals of the inverter.
  3. Check the fuse visually to see if it is blown or damaged. If it is blown, the fuse element will be broken, or the glass or plastic casing may be discolored or cracked.
  4. If the fuse is blown, remove it from the fuse holder by gently pulling it out.
  5. Determine the rating of the blown fuse by checking the label on the fuse or referring to the inverter's manual. It is important to replace the fuse with the same rating to ensure proper protection of the inverter.
  6. Obtain a new fuse with the same rating as the blown fuse.
  7. Insert the new fuse into the fuse holder, making sure it is fully seated.
  8. Reassemble the inverter and plug it back into the power source.
  9. Turn on the inverter and test it to make sure it is working correctly.

If the inverter still does not work after replacing the fuse, it may be an indication of a more significant problem. In this case, it may be best to hire a professional from Locals4u for assistance or contact the manufacturer's customer support for further assistance.

READ MORE
blog1
01
Mar

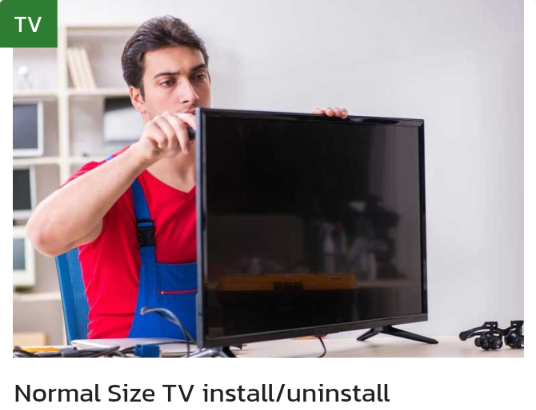
Tv Install Or Uninstall

Installing or uninstalling a TV. Here are the steps:

Installing a TV:

  1. Choose the location where you want to place the TV and make sure it has enough space.
  2. Unpack the TV and its accessories carefully.
  3. Place the TV on a stable and level surface.
  4. Attach the TV stand according to the manufacturer's instructions or mount the TV on the wall if you have a wall mount kit.
  5. Connect the power cable and other necessary cables to the TV.
  6. Turn on the TV and follow the on-screen instructions to complete the setup process.

Uninstalling a TV:

  1. Turn off the TV and unplug it from the power outlet.
  2. Remove any cables that are connected to the TV.
  3. If the TV is mounted on the wall, remove the mount bracket from the wall.
  4. If the TV has a stand, remove it according to the manufacturer's instructions.
  5. Carefully lift the TV off the surface or wall mount.
  6. Pack the TV and its accessories in the original box or suitable packaging.

It's important to handle the TV with care when installing or uninstalling it, as TVs can be fragile and heavy. It's also recommended to have another person assist you with lifting and moving the TV. if you are not experienced in installing or uninstalling TV, it may be best to hire a professional from Locals4u for assistance.

READ MORE
blog1
28
Feb

Double, Single Or Side By Side Door Fridge Checkup

The following are some basic steps for checking and repairing a fridge:

  1. Check for power: Ensure that the fridge is properly plugged in and that the electrical outlet is functioning correctly. If the outlet is not functioning correctly, try plugging in another device to see if it works.

  2. Check the thermostat: If the fridge is not cooling properly, check the thermostat settings to ensure that they are set correctly. If the thermostat is faulty, it may need to be replaced.

  3. Check the coils: The coils behind or underneath the fridge can become dirty or dusty over time, which can affect the fridge's cooling efficiency. Clean the coils with a vacuum cleaner or a brush.

  4. Check the door seals: Ensure that the door seals are tight and not allowing any air to escape. If the door seals are faulty, they may need to be replaced.

  5. Check the Evaporator Fan: The evaporator fan is responsible for circulating the cool air throughout your fridge. If the fan is not working properly, your fridge may not cool properly. Check if the fan is spinning and if it's not, it may need to be replaced.

  6. Defrost the Fridge: If you notice frost buildup in your fridge, it may be preventing the fridge from cooling properly. Defrost your fridge by unplugging it and leaving the door open for several hours. Once the frost has melted, clean the interior and restart the fridge.

  7. Check the Condenser Fan: The condenser fan is responsible for dissipating the heat generated by the fridge. If the fan is not working properly, the fridge may not cool properly. Check if the fan is spinning and if it's not, it may need to be replaced.

  8. Check the Compressor: The compressor is responsible for compressing the refrigerant and sending it through the coils to cool the fridge. If the compressor is not working properly, your fridge may not cool properly. Check if the compressor is running, and if it's not, it may need to be replaced.

  9. Check the compressor: The compressor is the heart of the fridge's cooling system. If the compressor is not functioning correctly, the fridge will not cool properly. If you suspect that the compressor is faulty, it may need to be replaced.

Remember to always unplug your fridge before performing any maintenance or repairs. If you're unsure about what to do, it may be best to hire a professional from Locals4u to diagnose and repair the issue. Regular maintenance, such as cleaning the coils and checking the door seals, can help prevent issues with your fridge in the future.

READ MORE
blog1
28
Feb

Washing Machine Checkup Or Repair

Checking up a Washing Machine:

  1. Check the power supply: Ensure that the washing machine is properly plugged in and that the power outlet is working. Also, check if the circuit breaker has tripped or if there is a blown fuse.

  2. Check the water supply: Ensure that the water supply to the washing machine is not restricted, and the hoses are not clogged or kinked.

  3. Check the drain: Ensure that the drain is not clogged or blocked. Check the drain hose for any obstructions or damage.

  4. Check the door/lid: Ensure that the door or lid of the washing machine is closing properly and is not damaged.

  5. Check the drum: Check the drum of the washing machine for any foreign objects or obstructions. Also, check if it is spinning freely.

  6. Check the control panel: Check the control panel of the washing machine for any error codes or issues. Consult the user manual for further guidance.

Repairing a Washing Machine:

Note: Repairing a washing machine requires technical expertise and knowledge. It is recommended to consult a professional if you are not experienced in repairing washing machines.

  1. Replace damaged parts: If any parts of the washing machine are damaged, replace them with new ones. Common parts that may need replacement include the door or lid, hoses, pumps, belts, and bearings.

  2. Clean the washing machine: Regularly clean the washing machine to prevent the buildup of mold, mildew, and other debris. Use a cleaning solution designed for washing machines.

  3. Fix leaks: If there are leaks, check the hoses and connections for any damage. Replace any damaged parts, and ensure that the connections are tight and secure.

  4. Fix the drum: If the drum is not spinning properly or is making unusual noises, check the belt or bearings. Replace any damaged parts and ensure that they are installed correctly.

  5. Reset the control panel: If the washing machine is displaying error codes or malfunctions, reset the control panel by unplugging the machine for a few minutes and then plugging it back in.

Again, if you are not experienced in repairing washing machines, it may be best to hire a professional from Locals4u for assistance.

READ MORE
blog1
28
Feb

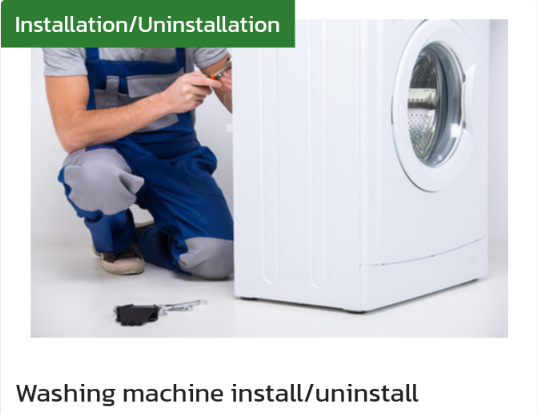
Washing Machine Install Or Uninstall

Installing a Washing Machine:

  1. Choose a location: Choose a suitable location for your washing machine, considering factors such as accessibility to water and electricity supply, ventilation, and drainage.

  2. Prepare the area: Clear the space where you plan to install the washing machine. Remove any obstacles, debris, and dust from the area.

  3. Connect the water supply: Connect the hoses from the washing machine to the hot and cold water faucets. Ensure that the connections are tight and secure to prevent leaks.

  4. Connect the drain hose: Connect the drain hose to the washing machine and the drain pipe. Ensure that the hose is properly inserted and secured to prevent leaks.

  5. Plug in the machine: Connect the washing machine to a power outlet. Ensure that the cord is not damaged and the plug is firmly inserted into the socket.

  6. Level the machine: Adjust the feet of the washing machine to ensure that it is level and stable. Use a spirit level to check the level of the machine.

  7. Test run: Run the washing machine through a test cycle to ensure that it is working properly.

Uninstalling a Washing Machine:

  1. Turn off the power: Disconnect the power supply by unplugging the machine from the outlet or turning off the circuit breaker.

  2. Turn off the water supply: Turn off the water supply by closing the hot and cold water valves.

  3. Disconnect the hoses: Disconnect the hoses from the washing machine by unscrewing them from the faucets and the machine. Be prepared for any water that may still be in the hoses.

  4. Disconnect the drain hose: Remove the drain hose from the washing machine and the drain pipe.

  5. Move the machine: Carefully move the washing machine away from its current location.

  6. Clean up: Clean up any water, debris, or dust that may have accumulated around the washing machine.

Note: If you are unsure about installing or uninstalling a washing machine, it may be best to hire a professional from Locals4u for assistance.


READ MORE
blog1
28
Feb

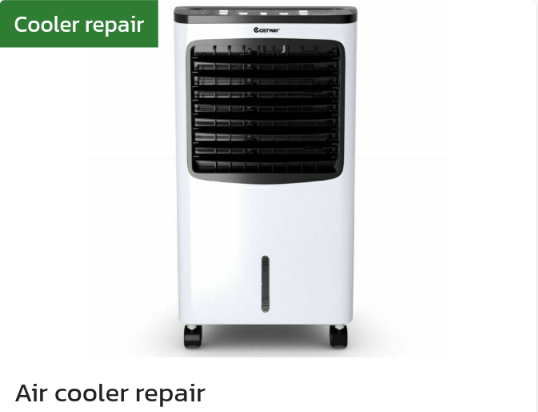
Air Cooler Repair

Repairing an air cooler can be done by following these steps:

  1. Unplug the air cooler from the power source.
  2. Check the air filter and clean or replace it if it is dirty. The air filter is usually located behind the front panel of the air cooler.
  3. Check the water tank and ensure that it is filled with clean water. If necessary, clean the water tank to remove any buildup or debris.
  4. Check the water pump and ensure that it is working correctly. If it is not working correctly, refer to the section on repairing or replacing the water pump.
  5. Check the fan blades and ensure that they are clean and free of any debris. Clean the fan blades if necessary.
  6. Check the fan motor and ensure that it is working correctly. If it is not working correctly, refer to the section on repairing or replacing the fan motor.
  7. Check the control panel and ensure that all the buttons and switches are functioning correctly.
  8. Check the power cable and ensure that it is securely connected to the air cooler.
  9. Plug in the air cooler and turn it on to check that it is working correctly.

If the air cooler is still not working correctly, it may require professional repairs or replacement.

It's important to note that repairing electrical appliances can be dangerous and may pose risks of electric shock.it may be best to hire a professional from Locals4u for assistance or contact the manufacturer for guidance on repairing the air cooler.


READ MORE
blog1
28
Feb

Air Cooler Water Pump Repair Or Replacement

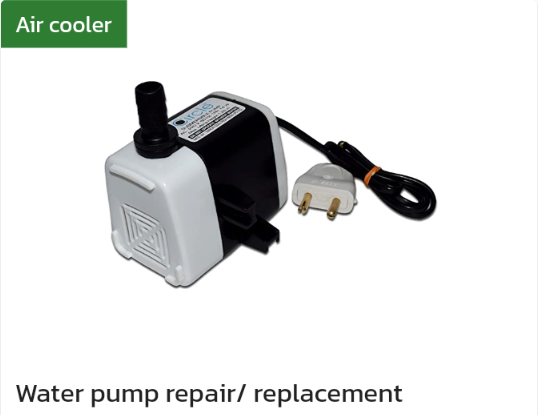
Repairing or replacing an air cooler water pump can be done by following these steps:

  1. Unplug the air cooler from the power source.
  2. Locate the water pump in the air cooler. It is usually located near the water tank.
  3. Check the water pump for any visible signs of damage, such as cracks or wear.
  4. If the water pump is damaged, it will need to be replaced. You can purchase a replacement water pump from a hardware store or contact the manufacturer for a replacement part.
  5. Remove the old water pump by disconnecting the power cable and unscrewing any screws that are holding it in place.
  6. Place the new water pump in the same position where the old pump was located.
  7. Connect the power cable to the new water pump and screw it into place.
  8. Fill the water tank with clean water.
  9. Plug in the air cooler and turn it on to check that the new water pump is working correctly.

If the water pump is not damaged, you may need to check the wiring connections to ensure they are secure and connected correctly. You can also clean the water pump and remove any debris that may be clogging it. If the problem persists, it may require professional repairs or replacement.

It's important to note that repairing electrical appliances can be dangerous and may pose risks of electric shock.it may be best to hire a professional from Locals4u for assistance or contact the manufacturer for guidance on repairing or replacing the air cooler water pump.

READ MORE
blog1
28
Feb

Air Cooler Fan Motor Repair

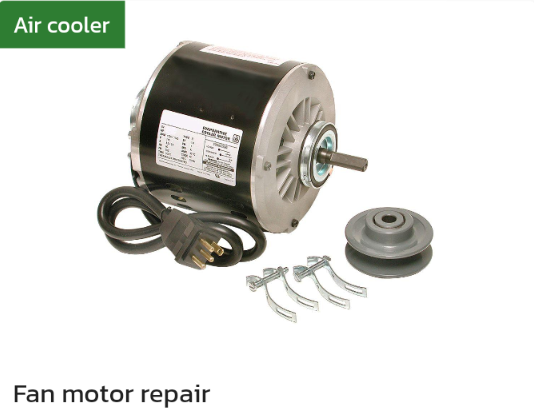
Repairing an air cooler fan motor can be challenging and may require advanced technical skills. However, you can try the following steps:

  1. Unplug the air cooler from the power source.
  2. Remove the screws or clips that are holding the fan grille in place.
  3. Take off the fan grille and set it aside.
  4. Locate the motor that powers the fan blades.
  5. Check the motor for any signs of damage, such as a broken shaft, worn bearings, or burnt wiring.
  6. If the motor is damaged, it may need to be replaced. You can contact the manufacturer for a replacement motor or purchase one from a hardware store.
  7. If the motor is not damaged, check the wiring connections to ensure they are secure and connected correctly.
  8. Test the motor by plugging in the air cooler and turning it on. Listen for any unusual sounds or vibrations coming from the motor.
  9. If the motor is still not working correctly, it may require professional repairs or replacement.

It's worth noting that repairing electrical appliances can be dangerous and may pose risks of electric shock.it may be best to hire a professional from Locals4u for assistance or contact the manufacturer for guidance on repairing the air cooler fan motor.

READ MORE
blog1
28
Feb

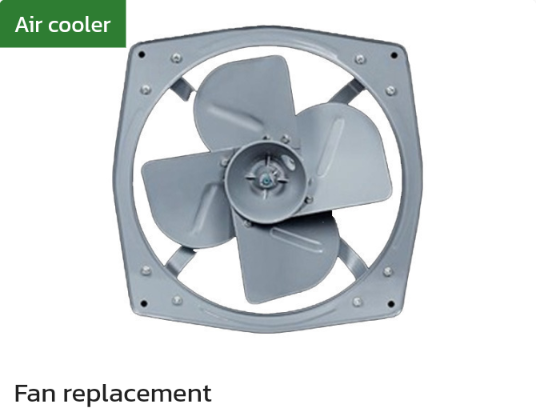
Air Cooler Fan Replacement

Replacing an air cooler fan can be a simple task that can be done by following these steps:

  1. Unplug the air cooler from the power source.
  2. Remove the screws or clips that are holding the fan grille in place.
  3. Take off the fan grille and set it aside.
  4. Disconnect the power cables or wires that are connecting the fan to the air cooler. You may need to use a screwdriver to loosen the screws or clips that hold the wires in place.
  5. Remove the old fan from the air cooler by gently pulling it out.
  6. Place the new fan in the same position where the old fan was located. Make sure the new fan's orientation is the same as the old fan.
  7. Connect the power cables or wires to the new fan. Ensure that they are connected securely and correctly.
  8. Place the fan grille back into place and secure it with the screws or clips that you removed earlier.
  9. Plug the air cooler back into the power source and turn it on to check that the new fan is working correctly.

If you are unsure or uncomfortable with replacing the air cooler fan,it may be best to hire a professional from Locals4u for assistance.

READ MORE
blog1
28
Feb

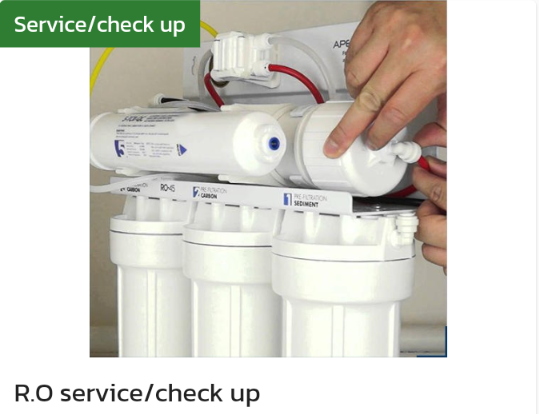
R.o. Service Or Check Up

Regular servicing of a Reverse Osmosis (RO) system is important to ensure its proper functioning and to extend its lifespan. Here are some general steps on how to service an RO system:

  1. Change the pre-filters: The pre-filters in an RO system need to be changed periodically, depending on the level of usage and water quality. The pre-filters help to remove sediment and chlorine from the water before it reaches the RO membrane. Replace the pre-filters as recommended by the manufacturer.

  2. Clean the RO membrane: The RO membrane needs to be cleaned periodically to remove any accumulated sediments or impurities. Follow the manufacturer's instructions on how to clean the RO membrane.

  3. Check the tank pressure: The tank pressure should be checked periodically to ensure that it is within the recommended range. If the pressure is too high or too low, adjust it as necessary.

  4. Check the tank valve: The tank valve should be checked periodically to ensure that it is functioning correctly. If the valve is faulty, replace it.

  5. Check the tubing: Check the tubing for any signs of damage or leakage. Replace the tubing if necessary.

  6. Sanitize the system: Sanitize the RO system periodically to kill any bacteria or germs that may have accumulated. Follow the manufacturer's instructions on how to sanitize the system.

  7. Check the flow rate: The flow rate of the RO system should be checked periodically to ensure that it is within the recommended range. If the flow rate is too low, check the pre-filters, RO membrane, and tubing for any blockages or damage.

It is recommended to service your RO system at least once a year or as recommended by the manufacturer. Following a regular servicing schedule can help prevent breakdowns, improve water quality, and extend the lifespan of your RO system. if you are not comfortable working with RO system, it may be best to hire a professional from Locals4u for assistance.

READ MORE
blog1
28
Feb

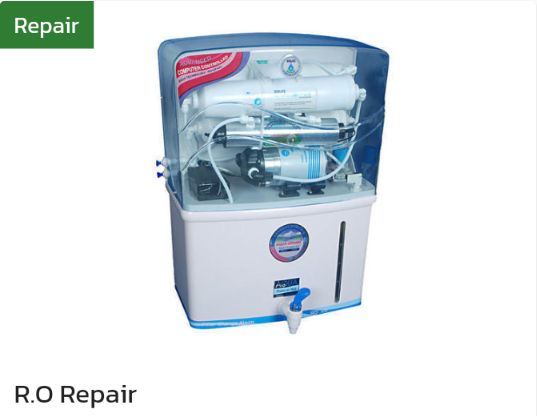
R.o. Repair

Repairing a Reverse Osmosis (RO) system can be tricky and may require the help of a professional technician. However, there are some basic steps you can take before calling for help. Here are some general steps on how to repair an RO system:

  1. Check the water pressure: If the water pressure is low, it may be due to a clogged pre-filter. Check the pre-filter and replace it if necessary.

  2. Check the RO membrane: If the water quality is poor, it may be due to a faulty RO membrane. Check the RO membrane for any signs of damage or leakage. Replace the membrane if necessary.

  3. Check the tubing: If the RO system is leaking, check the tubing for any signs of damage or leakage. Replace the tubing if necessary.

  4. Check the tank: If the tank is not filling or is not holding water, it may be due to a faulty tank valve or a damaged tank bladder. Check the valve and the bladder and replace them if necessary.

  5. Check the solenoid valve: If the RO system is not turning on or off, it may be due to a faulty solenoid valve. Check the valve and replace it if necessary.

  6. Call a professional: If you are unable to identify or fix the problem,it may be best to hire a professional from Locals4u to repair your RO system. Attempting to repair an RO system without the necessary skills or knowledge can be dangerous.

It is recommended to follow the manufacturer's instructions and safety precautions when repairing an RO system. Regular maintenance of your RO system can help prevent breakdowns and reduce the need for repairs.

READ MORE
blog1
28
Feb

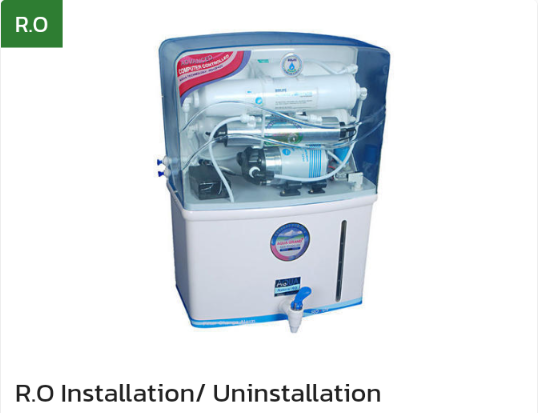
R.o. Installation Or Uninstallation

Installation of Reverse Osmosis (RO) System:

Installing a Reverse Osmosis (RO) system is not a complicated process, but it does require some basic plumbing skills. Here are the steps to install an RO system:

  1. Choose a location: Choose a location for the RO system that is close to a water supply and a power outlet.

  2. Install the faucet: Install the faucet that comes with the RO system on the sink. Drill a hole in the sink for the faucet if required.

  3. Install the drain saddle: Install the drain saddle that comes with the RO system on the sink drain.

  4. Connect the tubing: Connect the tubing from the RO system to the faucet and the drain saddle.

  5. Install the RO membrane: Install the RO membrane in the housing that comes with the system.

  6. Install the filters: Install the pre-filters in their respective housings. These filters help to remove sediment and chlorine from the water before it reaches the RO membrane.

  7. Connect the water supply: Connect the water supply to the RO system.

  8. Turn on the water and check for leaks: Turn on the water and check for any leaks. Tighten the connections if required.

Uninstallation of Reverse Osmosis (RO) System:

Uninstalling a Reverse Osmosis (RO) system is a simple process that can be done in a few steps:

  1. Turn off the water supply: Turn off the water supply to the RO system.

  2. Disconnect the tubing: Disconnect the tubing from the faucet and the drain saddle.

  3. Remove the filters: Remove the pre-filters and the RO membrane from their respective housings.

  4. Remove the drain saddle and faucet: Remove the drain saddle and faucet from the sink.

  5. Remove the RO system: Remove the RO system from its location.

  6. Clean the sink: Clean the sink and remove any residue or adhesive left behind by the RO system.

It is recommended to follow the manufacturer's instructions when installing or uninstalling an RO system. it may be best to hire a professional from Locals4u for assistance.

READ MORE
blog1
28
Feb

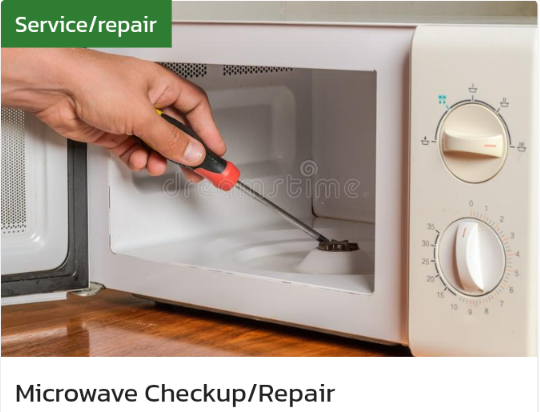
Microwave Checkup Or Repair

Repairing a microwave can be dangerous and should only be attempted by a qualified technician from locals4u. However, there are some simple steps you can take before calling a professional. Here are some general steps on how to repair a microwave:

  1. Check the power supply: If the microwave is not turning on, check the power supply. Make sure that the microwave is plugged in and the circuit breaker or fuse is not tripped.

  2. Check the door switch: If the microwave is not starting when the door is closed, it may be due to a faulty door switch. Check the door switch to ensure that it is functioning correctly.

  3. Inspect the fuse: If the microwave is not turning on, it may be due to a blown fuse. Check the fuse and replace it if necessary.

  4. Examine the capacitor: If the microwave is not heating properly, it may be due to a faulty capacitor. Check the capacitor for any signs of damage or leakage.

  5. Test the diode: If the microwave is not heating properly, the diode may be faulty. Test the diode using a multimeter and replace it if necessary.

  6. Check the magnetron: The magnetron is responsible for producing the microwaves that heat the food. If the microwave is not heating properly, the magnetron may be faulty. Check the magnetron for any signs of damage or burning.

  7. Call a professional: If you are unable to identify or fix the problem, it is best to call a qualified technician to repair your microwave. Attempting to repair a microwave without the necessary skills or knowledge can be dangerous.

It is recommended to follow the manufacturer's instructions and safety precautions when repairing a microwave. Regular cleaning and maintenance of your microwave can help prevent breakdowns and reduce the need for repairs. it may be best to hire a professional from Locals4u for assistance.

READ MORE
blog1
28
Feb

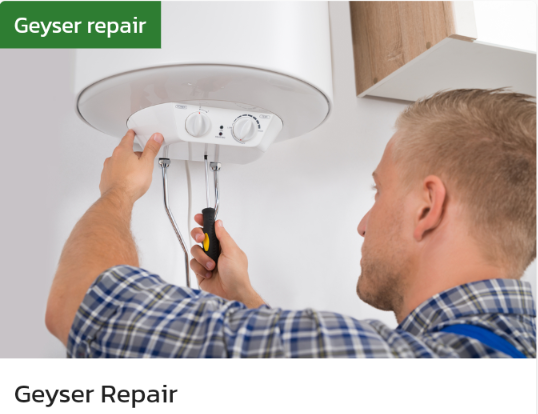
Geyser Repair

Repairing a home base geyser can be a challenging task and should only be attempted by someone with a basic understanding of plumbing and electrical work. Here are the steps to repair a home base geyser:

  1. Turn off the power supply: Before beginning any repair work, make sure to turn off the power supply to the geyser. This is important to avoid any electrical shocks or accidents.

  2. Troubleshoot the problem: Identify the issue with your geyser. Is it not heating the water, is it leaking or making strange noises? Troubleshooting the problem will help you identify the source of the problem and the required repair work.

  3. Check the thermostat: If the water is not heating up, check the thermostat. If it is faulty or not working correctly, it may need to be replaced.

  4. Inspect the heating element: If the thermostat is functioning correctly, check the heating element. If it is damaged or corroded, it will need to be replaced.

  5. Check the pressure relief valve: If the geyser is leaking, check the pressure relief valve. If it is not functioning correctly, it may need to be replaced.

  6. Replace faulty parts: Once you have identified the faulty part, replace it with a new one. Make sure to follow the manufacturer's instructions and use the correct tools.

  7. Test the geyser: Once the repair work is completed, turn on the water and power supply to the geyser. Test the geyser to ensure that it is functioning correctly.

it may be best to hire a professional from Locals4u to repair your home base geyser, especially if you are unsure about the repair work or don't have the necessary skills or tools. Regular maintenance and servicing of your geyser can help prevent breakdowns and reduce the need for repairs.

READ MORE
blog1
28
Feb

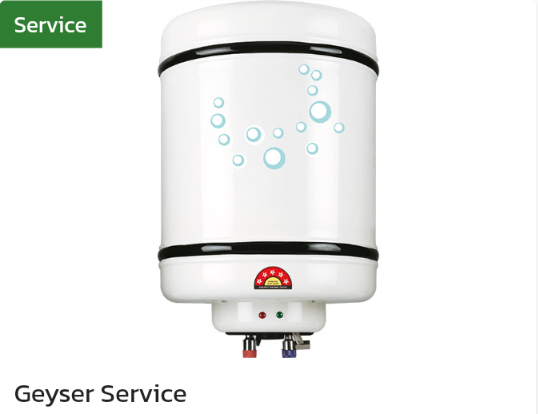
Geyser Service

Servicing a home base geyser is an essential task that should be performed regularly to ensure its efficiency and longevity. Here are the steps to service a home base geyser:

  1. Turn off the power supply: Before beginning the servicing, make sure to turn off the power supply to the geyser. This is important to avoid any electrical shocks or accidents.

  2. Drain the water: Turn off the water supply to the geyser and let it cool down. Once it is cooled, drain the water from the geyser by opening the drain valve at the bottom of the tank. This will remove any sediment or debris that has collected at the bottom of the tank.

  3. Check the anode rod: The anode rod is a sacrificial metal rod that is designed to attract and corrode any minerals or impurities in the water, protecting the tank from rust and corrosion. Check the anode rod for signs of wear and tear. If it is more than 50% corroded, it should be replaced.

  4. Clean the tank: Use a brush or a soft cloth to clean the interior of the tank. This will remove any residue or sediment that may have built up on the walls.

  5. Inspect the heating element: Check the heating element for any signs of damage or corrosion. If the element is damaged or corroded, it will need to be replaced.

  6. Reassemble and refill: Reassemble the geyser, turn on the water supply and fill the tank. Turn on the power supply and allow the geyser to heat up.

  7. Test the temperature and pressure relief valve: Test the temperature and pressure relief valve by lifting the lever to ensure that it is working correctly.

Regular servicing of your home base geyser can help extend its lifespan, improve efficiency and reduce the risk of breakdowns or malfunctions. It is recommended to service your geyser at least once a year or as per the manufacturer's instructions. it may be best to hire a professional from Locals4u for assistance.

READ MORE
blog1
28
Feb

Geyser Uninstallation

The process for uninstalling a home base geyser may vary depending on the specific model and installation. However, here are some general steps that can guide you through the process:

  1. Turn off the power supply to the geyser by switching off the circuit breaker in the distribution box.

  2. Shut off the water supply to the geyser by closing the valve that feeds water to the geyser. This valve is usually located on the inlet pipe on the cold water side.

  3. If the geyser is connected to a gas supply, shut off the gas valve that feeds the geyser.

  4. Open the hot water tap nearest to the geyser to relieve any pressure in the system.

  5. If there is any electrical wiring or gas piping connected to the geyser, disconnect it. This may require the help of a professional electrician or gas technician.

  6. Remove any fittings or brackets that are holding the geyser in place. These may include mounting brackets, screws, or bolts.

  7. Carefully remove the geyser from its position, taking care not to damage any pipes or wiring that may still be connected to it.

  8. Dispose of the geyser according to local regulations. Some areas may require that you take the geyser to a recycling or disposal facility, while others may allow you to dispose of it in your regular trash.

  9. Close the hot water tap that was opened earlier and turn on the water supply to the rest of the house.

  10. Restore power to the circuit breaker and turn on the gas valve if applicable.

it may be best to hire a professional from Locals4u for assistance. if you are unsure about any step in the process or if you encounter any difficulties during the uninstallation.

READ MORE
blog1
28
Feb

Geyser Installation

Installing a home base geyser can be a challenging task and requires some knowledge of plumbing and electrical work. If you're not comfortable with DIY projects, it's best to hire a professional plumber or electrician to install the geyser for you from Locals4u. However, if you're confident in your abilities, here are some general steps to follow:

  1. Choose a location: Choose a location for the geyser that is near the point of use, such as a bathroom or kitchen. The location should also be accessible for maintenance and repair work.

  2. Install the mounting brackets: Install the mounting brackets on the wall where the geyser will be installed. Use a level to ensure that the brackets are even and secure.

  3. Connect the water supply: Connect the water supply to the geyser. This may involve installing a valve and piping to connect the geyser to the main water line.

  4. Install the safety valve: Install the safety valve on the geyser. This valve will release excess pressure in the event of an overheating or other safety issue.

  5. Connect the electrical supply: Connect the electrical supply to the geyser. This may involve wiring the geyser to a circuit breaker and installing a power outlet near the geyser.

  6. Fill and test the geyser: Fill the geyser with water and test it to ensure that it is heating properly and the safety features are working correctly.

  7. Install a drain pipe: Install a drain pipe to remove any excess water that may accumulate due to leakage or condensation.

It's important to note that the specific steps for installing a geyser may vary depending on the type of geyser, the location, and local building codes and regulations. If you're unsure about any aspect of the process, it may be best to hire a professional from Locals4u for assistance.. Additionally, be sure to take proper safety precautions when working with water and electricity, such as wearing protective gear and turning off the power and water supply before starting the installation.

READ MORE
blog1
28
Feb

Chimney Repair (basic Or Wall Mounted)

Repairing a home base chimney can be a challenging task and requires some knowledge and experience in masonry and construction. If you're not comfortable with DIY projects, it's best to hire a professional chimney repair company to assess and fix the issue. However, if you're confident in your abilities, here are some general steps to follow:

  1. Inspect the chimney: Conduct a thorough inspection of the chimney to identify any damage or issues. Look for cracks, missing bricks, mortar erosion, or other signs of wear and tear.

  2. Clean the chimney: Clean the chimney to remove any debris, soot, or creosote buildup. This will allow you to see the damage more clearly and ensure that the repairs will be effective.

  3. Replace damaged bricks or mortar: Replace any damaged or missing bricks or mortar joints in the chimney. Use a high-quality mortar mix and apply it evenly to ensure a strong bond. If you're not sure how to replace bricks or mortar, consult a masonry guide or hire a professional chimney repair company.

  4. Install a chimney cap: If your chimney does not have a cap, install one to prevent rain, snow, and debris from entering the chimney. A cap will also help protect the chimney from animals that may try to nest inside.

  5. Waterproof the chimney: Apply a waterproof sealant to the exterior of the chimney to prevent water damage and extend the life of the chimney. Be sure to choose a sealant that is compatible with your chimney's material and follow the manufacturer's instructions carefully.

  6. Install a chimney liner: If your chimney does not have a liner or the existing liner is damaged, consider installing a new one. A chimney liner will protect the chimney from heat and corrosive byproducts and improve its efficiency.

It's important to note that the specific repairs needed for a home base chimney will depend on the extent of the damage and the type of chimney. If you're not sure how to proceed or feel unsure about your abilities, it may be best to hire a professional from Locals4u for assistance. Additionally, be sure to take proper safety precautions when working on a chimney, such as wearing protective gear and using sturdy ladders or scaffolding.

READ MORE
blog1
28
Feb

Chimney Uninstallation Basic Or Wall Mounted

Uninstalling a chimney can be a challenging and potentially dangerous task, and it's usually best to hire a professional chimney installer or contractor to do the job. However, if you're confident in your DIY skills and want to attempt it yourself, here are some general steps to follow:

  1. Turn off any appliances connected to the chimney: Before you begin, ensure that any stoves or fireplaces connected to the chimney are turned off and have cooled down completely.

  2. Remove the chimney cap: Remove the chimney cap by unscrewing any screws or bolts that hold it in place. Lift the cap off carefully and set it aside.

  3. Disconnect the stove or fireplace: If the chimney is connected to a stove or fireplace, disconnect the appliance from the chimney by removing any connector pipes or other attachments.

  4. Remove the chimney liner: Remove the chimney liner by pulling it down through the chimney from the top. If the liner is stuck, use a chimney brush or other tool to loosen it and gently pull it down.

  5. Dismantle the chimney: Dismantle the chimney by removing any bricks, blocks, or other materials that make up the chimney. Start at the top and work your way down, being careful not to damage the surrounding structure.

  6. Repair any damage: Once the chimney is removed, repair any damage to the roof or ceiling where the chimney was located. This may involve patching holes, replacing tiles or shingles, or repairing drywall.

It's important to note that the specific steps for uninstalling a chimney may vary depending on the type of chimney, the type of stove or fireplace, and local building codes and regulations. If you're unsure about any aspect of the process, it may be best to hire a professional from Locals4u for assistance. Additionally, be sure to take proper safety precautions, such as wearing protective gear and using sturdy ladders or scaffolding.

READ MORE
blog1
28
Feb

Chimney Installation Basic Or Wall Mounted

Installing a chimney in your home requires a fair amount of skill and expertise, and it's usually best to hire a professional chimney installer to ensure the job is done correctly. However, if you have experience with DIY projects and feel confident in your abilities, here are the general steps involved in installing a chimney:

  1. Choose the location: Determine where you want to install the chimney. The location should be away from any flammable materials and provide adequate ventilation.

  2. Prepare the area: Prepare the area by removing any obstacles, such as cabinets or shelving, and ensuring there is enough space for the chimney. If necessary, make any structural modifications to the wall or ceiling to support the weight of the chimney.

  3. Install the flue: The flue is the pipe that carries the smoke and exhaust from the fireplace or stove to the outside. Install the flue by inserting it through the ceiling and roof. Ensure that the flue is sealed tightly to prevent any air leakage.

  4. Install the chimney cap: The chimney cap is a protective covering that sits on top of the chimney and prevents rain, snow, and debris from entering the flue. Install the chimney cap securely and ensure that it is properly sealed.

  5. Install the chimney liner: The chimney liner is a protective layer that lines the interior of the chimney and protects it from heat and corrosive byproducts. Install the chimney liner by feeding it through the flue and attaching it to the top of the chimney cap.

  6. Connect the stove or fireplace: If you're installing a chimney for a stove or fireplace, connect the stove or fireplace to the flue using a connector pipe. Ensure that the connector pipe is securely fastened to the flue and the stove or fireplace.

  7. Test the chimney: Test the chimney to ensure that it is working properly and there are no leaks or obstructions.

It's important to note that the specific steps and requirements for installing a chimney may vary depending on the type of chimney, the type of stove or fireplace, and local building codes and regulations. If you're unsure about any aspect of the installation process, it may be best to hire a professional from Locals4u for assistance.

READ MORE
blog1
28
Feb

Room Heater Repair

The specific steps for repairing a room heater will depend on the type of heater and the nature of the problem. Here are some general steps you can take to troubleshoot and potentially repair a room heater:

  1. Check the power supply: Make sure the room heater is plugged in and the power supply is turned on. Check the circuit breaker or fuse box to make sure the breaker or fuse for the room heater hasn't tripped or blown.

  2. Check the thermostat: Make sure the thermostat is set to the desired temperature and is functioning properly. If the thermostat is not working, it may need to be replaced.

  3. Check the heating element: If the room heater is not producing heat, the heating element may be faulty. Check the heating element and replace it if necessary.

  4. Check the fan: If the room heater has a fan and the fan is not working, the heater may not be able to distribute heat effectively. Check the fan and replace it if necessary.

  5. Check the safety features: Many room heaters have safety features such as automatic shut-off switches or overheat protection. If these features are activated, the room heater may not function properly. Check the safety features and reset them if necessary.

If these troubleshooting steps do not resolve the issue, it's best to call a professional technician to diagnose and repair the room heater. Attempting to repair the room heater without proper training and equipment can be dangerous and may cause further damage to the heater. it may be best to hire a professional from Locals4u for assistance.

READ MORE
blog1
28
Feb

Ac Repair Split Or Window

Repairing an AC system can be a complex process, and it's usually best left to a professional Locals4u technician. However, there are a few simple steps you can take to troubleshoot and potentially repair your AC before calling a professional:

  1. Check the power supply: Make sure the AC unit is plugged in and the power supply is turned on. Check the circuit breaker or fuse box to make sure the breaker or fuse for the AC unit hasn't tripped or blown.

  2. Check the thermostat: Make sure the thermostat is set to the desired temperature and is functioning properly. If the thermostat is not working, it may need to be replaced.

  3. Check the air filter: A dirty or clogged air filter can cause the AC system to malfunction or stop working altogether. Check the air filter and replace it if necessary.

  4. Check the condenser coils: The condenser coils may become dirty or clogged with debris over time, causing the AC system to run inefficiently or not at all. Use a soft brush or a fin comb to clean the coils and remove any debris.

  5. Check the refrigerant levels: If the AC system is not cooling properly, it may be low on refrigerant. Check the refrigerant levels and add more if necessary. However, adding refrigerant is a job that is best left to a professional HVAC technician.

If these troubleshooting steps do not resolve the issue, it's best to call a professional Locals4u technician to diagnose and repair the AC system. Attempting to repair the system without proper training and equipment can be dangerous and may cause further damage to the system.

READ MORE
blog1
28
Feb

Deep Cleaning Split Ac Service

Deep cleaning a split AC involves several steps, including removing the air filters, cleaning the evaporator and condenser coils, and sanitizing the unit. Here are the general steps for deep cleaning a split AC:

  1. Turn off the power supply: Make sure the power supply to the split AC is turned off at the main circuit breaker or disconnect switch. This will prevent any electrical shock or damage to the system during the cleaning process.

  2. Remove the air filters: Depending on the split AC unit, the air filters may be located in the indoor or outdoor unit. Remove the air filters from the unit by releasing any clips or screws holding them in place.

  3. Clean the air filters: If the air filters are reusable, clean them with warm water and a mild detergent. If they are disposable, replace them with new ones.

  4. Clean the evaporator and condenser coils: Use a soft brush or a fin comb to remove any dirt or debris from the evaporator and condenser coils. Spray the coils with a coil cleaner or a solution of warm water and vinegar, and let it sit for 10-15 minutes. Rinse the coils thoroughly with water and allow them to dry.

  5. Clean the drain pan and drain line: Remove any dirt or debris from the drain pan and use a pipe cleaner or a small brush to clean the drain line. Flush the drain line with warm water to clear any clogs.

  6. Sanitize the unit: Use a solution of warm water and a disinfectant cleaner to sanitize the inside of the AC unit. Wipe down the surfaces with a soft cloth and allow the unit to dry completely.

  7. Reassemble the unit: Reinsert the air filters and attach them back onto the indoor or outdoor unit. Turn on the power supply and test the unit to make sure it is functioning properly.

It is recommended to deep clean your split AC at least once a year or more often if you use it frequently or if you live in a dusty or humid environment. Regular cleaning can improve the efficiency of the unit and help prolong its lifespan. if you are not comfortable working with Electrical Appliances, it may be best to hire a professional from Locals4u for assistance.

READ MORE
blog1
28
Feb

Deep Cleaning Window Ac Service

Deep cleaning a window AC involves several steps, including removing the front cover and air filter, cleaning the evaporator and condenser coils, and sanitizing the unit. Here are the general steps for deep cleaning a window AC:

  1. Turn off the power supply: Make sure the power supply to the window AC is turned off at the main circuit breaker or disconnect switch. This will prevent any electrical shock or damage to the system during the cleaning process.

  2. Remove the front cover and air filter: Remove the front cover of the window AC unit by releasing any clips or screws holding it in place. Take out the air filter from its slot.

  3. Clean the air filter: If the air filter is reusable, clean it with warm water and a mild detergent. If it is disposable, replace it with a new one.

  4. Clean the evaporator and condenser coils: Use a soft brush or a fin comb to remove any dirt or debris from the evaporator and condenser coils. Spray the coils with a coil cleaner or a solution of warm water and vinegar, and let it sit for 10-15 minutes. Rinse the coils thoroughly with water and allow them to dry.

  5. Clean the drain pan and drain line: Remove any dirt or debris from the drain pan and use a pipe cleaner or a small brush to clean the drain line. Flush the drain line with warm water to clear any clogs.

  6. Sanitize the unit: Use a solution of warm water and a disinfectant cleaner to sanitize the inside of the AC unit. Wipe down the surfaces with a soft cloth and allow the unit to dry completely.

  7. Reassemble the unit: Reinsert the air filter and attach the front cover back onto the unit. Turn on the power supply and test the unit to make sure it is functioning properly.

It is recommended to deep clean your window AC at least once a year or more often if you use it frequently or if you live in a dusty or humid environment. Regular cleaning can improve the efficiency of the unit and help prolong its lifespan. and if you are not comfortable working with Electrical Appliances, it may be best to hire a professional from Locals4u for assistance.

READ MORE
blog1
28
Feb

Window Ac Uninstallation

Uninstalling a window AC involves several steps, including turning off the power supply, removing the unit from the window, and disconnecting any electrical or drainage connections. Here are the general steps for uninstalling a window AC:

  1. Turn off the power supply: Make sure the power supply to the window AC is turned off at the main circuit breaker or disconnect switch. This will prevent any electrical shock or damage to the system during the uninstallation process.

  2. Remove the front cover: Remove the front cover of the window AC unit by releasing any clips or screws holding it in place. This will give you access to the mounting bracket.

  3. Remove the mounting bracket: Unscrew the mounting bracket from the window sill or frame, and remove any screws or fasteners holding the AC unit in place. Carefully lift the unit out of the window and onto a flat surface.

  4. Disconnect the electrical connections: Disconnect any electrical wires or connections from the AC unit, following the manufacturer's instructions and any local codes or regulations. Cover any exposed wires with electrical tape or wire nuts.

  5. Disconnect the drainage connections: If your window AC unit has a drainage hose, disconnect it from the back of the unit and drain any remaining water from the hose.

  6. Clean the AC unit: Use a soft cloth to wipe down the AC unit, removing any dirt or debris. Clean or replace the air filter as needed.

  7. Store the AC unit: If you plan to store the AC unit for an extended period, wrap it in a plastic bag or cover it with a tarp to protect it from dust and moisture. Store the unit in a dry, cool place.

It is important to read and follow the manufacturer's instructions for your specific window AC unit to ensure proper uninstallation and avoid any safety hazards. If you are unsure about any steps in the uninstallation process,  it may be best to hire a professional from Locals4u for assistance.

READ MORE
blog1
28
Feb

Split Ac Uninstallation

Uninstalling a split AC involves several steps, including turning off the power supply, disconnecting the refrigerant lines and electrical connections, and removing the indoor and outdoor units. Here are the general steps for uninstalling a split AC:

  1. Turn off the power supply: Make sure the power supply to the split AC is turned off at the main circuit breaker or disconnect switch. This will prevent any electrical shock or damage to the system during the uninstallation process.

  2. Disconnect the refrigerant lines: Use a refrigerant recovery machine to remove any remaining refrigerant from the system. Disconnect the refrigerant lines from the indoor and outdoor units, and cap them to prevent any leakage.

  3. Disconnect the electrical connections: Disconnect the electrical wires from the indoor and outdoor units, following the manufacturer's instructions and any local codes or regulations. Remove any conduit or insulation covering the wires.

  4. Remove the indoor unit: Carefully remove the indoor unit from the mounting plate on the wall, and disconnect any remaining wiring or accessories. Cover the opening in the wall with a patch panel or drywall.

  5. Remove the outdoor unit: Disconnect any remaining wiring or accessories from the outdoor unit, and remove the unit from its mounting base. Use a vacuum pump to remove any remaining moisture from the refrigerant lines.

  6. Clean up the area: Remove any debris or tools from the installation area, and clean up any spilled refrigerant or oil. Dispose of any hazardous materials in accordance with local regulations.

It is important to read and follow the manufacturer's instructions for your specific split AC unit to ensure proper uninstallation and avoid any safety hazards. If you are unsure about any steps in the uninstallation process,  it may be best to hire a professional from Locals4u for assistance.

READ MORE
blog1
28
Feb

Split Ac Installation

Installing a split AC involves several steps, including selecting the right location, mounting the indoor and outdoor units, connecting the refrigerant lines, and wiring the electrical connections. Here are the general steps for installing a split AC:

  1. Choose the right location: Look for a location that is close to an electrical outlet and allows easy access for installation, maintenance, and repairs. You should also consider factors like the size of the room, the amount of sunlight it receives, and the orientation of the windows and doors.

  2. Mount the indoor unit: Install the mounting plate on the wall, and attach the indoor unit to it. Make sure the unit is level and securely fastened to the wall.

  3. Mount the outdoor unit: Select a location for the outdoor unit that is flat, stable, and well-ventilated. Mount the unit on a concrete or metal base, and secure it with bolts or screws.

  4. Connect the refrigerant lines: Run the refrigerant lines from the indoor unit to the outdoor unit, making sure to follow the manufacturer's instructions for proper placement and insulation. Use a vacuum pump to remove any air or moisture from the lines.

  5. Wire the electrical connections: Connect the electrical wires from the indoor unit to the outdoor unit, following the manufacturer's instructions and any local codes or regulations. Make sure the power supply is turned off before making any electrical connections.

  6. Test the system: Turn on the power supply, and test the system to make sure it is functioning properly. Check the temperature, airflow, and noise levels to ensure everything is working as expected.

  7. Finish the installation: Install any necessary accessories, such as the remote control or drain pipe, and cover any exposed wires or refrigerant lines with conduit or insulation. Clean up any debris or tools from the installation area.

It is important to read and follow the manufacturer's instructions for your specific split AC unit to ensure proper installation and avoid any safety hazards. If you are unsure about any steps in the installation process,  it may be best to hire a professional from Locals4u for assistance.

READ MORE
blog1
28
Feb

Window Ac Installation

Installing a window AC involves several steps, including selecting the right location, assembling the unit, and securing it in place. Here are the general steps for installing a window AC:

  1. Choose the right location: Look for a window with a nearby electrical outlet that can support the AC's power needs. You should also consider factors like the size of the room, the amount of sunlight it receives, and the orientation of the window.

  2. Assemble the unit: Follow the manufacturer's instructions to put together the AC unit. This may involve attaching the brackets and support arms, installing the filter and front cover, and attaching the power cord.

  3. Prepare the window: Remove any obstacles from the window sill, and make sure the window is clean and free of debris. You may also need to adjust the window size or install a window kit to fit the AC unit.

  4. Install the AC: Lift the AC unit into the window, making sure it rests on the brackets and support arms. Extend the side panels to fill any gaps between the AC unit and the window frame. Use screws or other fasteners to secure the unit in place.

  5. Connect the power: Plug in the AC unit to the nearby electrical outlet, and turn it on to test that it is functioning properly.

  6. Insulate the window: Use weatherstripping or foam insulation to seal any gaps around the window, which will prevent cool air from escaping and hot air from entering.

  7. Enjoy your cool space: Once the unit is properly installed and insulated, you can adjust the temperature settings to your desired level and enjoy your cool, comfortable space.

It is important to read and follow the manufacturer's instructions for your specific AC unit to ensure proper installation and avoid any safety hazards. If you are unsure about any steps in the installation process,  it may be best to hire a professional from Locals4u for assistance.

READ MORE
blog1
27
Feb

Door Bell Installation

Here are the general steps to install a doorbell:

  1. Choose a location: Choose the location where you want to install the doorbell. Make sure it's near the door and easily accessible.

  2. Turn off the power: Turn off the power to the existing doorbell or the area where you will be installing the doorbell.

  3. Mark the location: Use a pencil to mark the location where you want to install the doorbell. Use a level to make sure the mark is straight.

  4. Install the doorbell button: Remove the cover of the doorbell button and attach the base plate to the wall using screws. Connect the wires from the doorbell button to the wires on the wall. If the wires are not long enough, you may need to splice in additional wires.

  5. Install the chime unit: Mount the chime unit on the wall inside your home, near an electrical outlet. Connect the wires from the doorbell button to the chime unit. Plug in the chime unit to the electrical outlet.

  6. Turn on the power: Turn on the power to the doorbell and test it by pressing the doorbell button.

  7. Adjust the settings: Adjust the settings on the chime unit as needed, such as volume, chime sound, and any additional features.

Note: The above steps are a general guide, and the exact steps may vary depending on the specific doorbell you purchase. Be sure to read and follow the manufacturer's instructions carefully, and if you are not comfortable working with electrical wiring, it may be best to hire a professional from Locals4u for assistance.

READ MORE
blog1
27
Feb

Water Tank Alarm Installation

Installing a water tank alarm involves several steps. Here are the general steps you can follow:

  1. Purchase the water tank alarm kit: You can buy a water tank alarm kit from a hardware store or online.

  2. Determine the location for the alarm: Choose a location for the alarm that is near the water tank and where it will be easily audible.

  3. Install the sensor: Place the sensor in the water tank. You can either attach it to the side of the tank or float it on the surface of the water.

  4. Connect the wires: Connect the wires from the sensor to the alarm unit. The wires should be long enough to reach from the sensor to the alarm unit.

  5. Install the alarm unit: Mount the alarm unit in the chosen location, and attach it to the wall using screws or adhesive.

  6. Test the alarm: Fill the water tank to a level that triggers the alarm and check if the alarm sounds.

  7. Adjust the alarm sensitivity: Adjust the sensitivity of the alarm as needed. This will vary based on the size of your tank and your desired water level.

  8. Regular maintenance: Make sure to regularly check the alarm and sensor to ensure they are functioning properly.

Note: The above steps are a general guide, and the exact steps may vary depending on the specific water tank alarm kit you purchase. Be sure to read and follow the manufacturer's instructions carefully, or if you're not comfortable working with electricity, it may be best to hire a professional from Locals4u for assistance.


READ MORE
blog1
27
Feb

Mcb Fuse Replacement

Here are the general steps to replace an MCB fuse:

  1. Turn off the power: Before you begin, turn off the power to the circuit you'll be working on. You can do this by switching off the circuit breaker or removing the fuse.

  2. Open the MCB: Remove the cover from the MCB panel to access the fuse.

  3. Remove the fuse: Gently pull out the old fuse from the MCB.

  4. Check the fuse: Inspect the fuse to ensure it's blown or faulty. If the fuse is not visibly blown, use a multimeter to test for continuity.

  5. Choose the replacement fuse: Choose a replacement fuse with the same rating as the old one. The rating will be printed on the fuse.

  6. Install the new fuse: Gently insert the new fuse into the MCB.

  7. Close the MCB: Replace the cover on the MCB panel.

  8. Turn on the power: Once you're done, turn the power back on and test the circuit to ensure it's working correctly.

It's important to note that electrical work can be dangerous and should only be done by a licensed electrician. If you're unsure about any aspect of the process, or if you're not comfortable working with electricity, it may be best to hire a professional from Locals4u for assistance. Additionally, some MCBs may have specific installation requirements, so be sure to follow the manufacturer's instructions carefully.

READ MORE
blog1
27
Feb

Single Pole Mcb Installation

Here are the general steps to install a single pole MCB:

  1. Turn off the power: Before you begin, turn off the power to the circuit you'll be working on. You can do this by switching off the circuit breaker or removing the fuse.

  2. Choose a location: Determine the location where you want to install the MCB. It should be in a safe, accessible location and near the electrical panel.

  3. Gather the tools: You will need a screwdriver, wire cutters, wire strippers, and a voltage tester.

  4. Install the MCB: Snap the MCB into the DIN rail on the electrical panel. The MCB will click into place.

  5. Strip the wires: Use wire strippers to remove about 3/4 inch of insulation from the end of the wires.

  6. Connect the wires: Connect the black or red wire to the MCB's "load" terminal and the white wire to the "neutral" terminal. If there's a green or bare wire, connect it to the ground terminal.

  7. Test the connection: Use a voltage tester to ensure there's no current running through the wires.

  8. Turn on the power: Once you're done, turn the power back on and test the MCB to ensure it's working correctly.

It's important to note that electrical work can be dangerous and should only be done by a licensed electrician. If you're unsure about any aspect of the process, or if you're not comfortable working with electricity, it may be best to hire a professional from Locals4u for assistance. Additionally, some MCBs may have specific installation requirements, so be sure to follow the manufacturer's instructions carefully.


READ MORE
blog1
27
Feb

Sub Meter Installation

Installing a sub meter involves electrical work and should only be done by a licensed electrician. However, here are some general steps involved in installing a sub meter:

  1. Determine the location: Choose a location for the sub meter near the electrical panel where the main service enters the building. The sub meter should be mounted securely to the wall.

  2. Turn off the power: Before you begin, turn off the power to the circuit you'll be working on. You can do this by switching off the circuit breaker or removing the fuse.

  3. Install a junction box: Install a junction box near the sub meter to protect the electrical wires.

  4. Install a conduit: Install a conduit from the main electrical panel to the junction box, following local codes and regulations.

  5. Run wires: Run wires from the main electrical panel to the junction box and connect them to the sub meter, following the manufacturer's instructions.

  6. Connect the wires: Connect the wires from the main electrical panel to the sub meter, following the manufacturer's instructions.

  7. Turn on the power: Once you're done, turn the power back on and test the sub meter to ensure it's working correctly.

It's important to note that sub meter installation can vary depending on the specific model and requirements. Additionally, electrical work can be dangerous and should only be done by a licensed electrician. If you're unsure about any aspect of the process, or if you're not comfortable working with electricity, it may be best to hire a professional from Locals4u for assistance.

READ MORE
blog1
27
Feb

Tube Light Installation

Here are the general steps to install a tube light:

  1. Turn off the power: Before you begin, turn off the power to the circuit you'll be working on. You can do this by switching off the circuit breaker or removing the fuse.

  2. Gather the tools: You will need a screwdriver, wire cutters, wire strippers, and a voltage tester.

  3. Remove the old fixture: If there's an existing fixture, remove it by unscrewing the mounting bracket and disconnecting the wires.

  4. Install the mounting bracket: Attach the new mounting bracket to the ceiling or wall using screws provided.

  5. Connect the wires: Connect the wires from the electrical box to the wires on the tube light, following the manufacturer's instructions. Typically, this involves connecting the black or red wire to the black or red wire, the white wire to the white wire, and the green or bare wire to the green or bare wire.

  6. Install the tube light: Insert the tube light into the fixture and snap it into place. Make sure it's securely installed.

  7. Turn on the power: Once you're done, turn the power back on and test the tube light to ensure it's working correctly.

It's important to note that electrical work can be dangerous and should only be done by a qualified professional. If you're unsure about any aspect of the process, or if you're not comfortable working with electricity, it may be best to hire a professional from Locals4u for assistance. Additionally, some tube lights may have specific installation requirements, so be sure to follow the manufacturer's instructions carefully.

READ MORE
blog1
27
Feb

Bulb Holder Installation

Here are the general steps to install a bulb holder:

  1. Turn off the power: Before you begin, turn off the power to the circuit you'll be working on. You can do this by switching off the circuit breaker or removing the fuse.

  2. Choose a location: Determine the location where you want to install the bulb holder. It should be in a safe, accessible location and near an electrical outlet.

  3. Gather the tools: You will need a screwdriver, wire strippers, and a voltage tester.

  4. Install the electrical box: If there isn't already an electrical box in the location you've chosen, you will need to install one. Follow the manufacturer's instructions for installation.

  5. Strip the wires: Use wire strippers to remove about 3/4 inch of insulation from the end of the wires.

  6. Connect the wires: Connect the black or red wire to the brass screw on the bulb holder and the white wire to the silver screw. If there's a green or bare wire, connect it to the green screw.

  7. Secure the bulb holder: Use screws provided to secure the bulb holder to the electrical box.

  8. Test the connection: Use a voltage tester to ensure there's no current running through the wires.

  9. Install the bulb: Install the bulb into the bulb holder and turn on the power to test the connection.

It's important to note that electrical work can be dangerous and should only be done by a qualified professional. If you're unsure about any aspect of the process, or if you're not comfortable working with electricity, it may be best to hire a professional from Locals4u for assistance.

READ MORE
blog1
27
Feb

Decorative Light Installation

Installing a decorative light can vary depending on the type of light and its installation requirements. However, here are some general steps that can help you install a decorative light:

  1. Turn off the power: Before you begin, turn off the power to the circuit you'll be working on. You can do this by switching off the circuit breaker or removing the fuse.

  2. Prepare the installation area: Ensure the installation area is clean and clear of any debris or obstacles.

  3. Attach the mounting bracket: Attach the mounting bracket to the electrical box using screws, following the manufacturer's instructions.

  4. Connect the wires: Connect the wires from the electrical box to the wires on the light fixture, following the manufacturer's instructions. Typically, this involves connecting the black or red wire to the black or red wire, the white wire to the white wire, and the green or bare wire to the green or bare wire.

  5. Attach the light fixture: Attach the light fixture to the mounting bracket using screws or other methods, following the manufacturer's instructions.

  6. Install light bulbs: Install the light bulbs according to the manufacturer's instructions. Make sure not to exceed the maximum wattage listed on the fixture.

  7. Turn on the power: Once you're done, turn the power back on and test the light to ensure it's working correctly.

It's important to note that decorative lights can come in various shapes and sizes, so it's crucial to follow the manufacturer's instructions to ensure proper installation. Additionally, electrical work can be dangerous and should only be done by a qualified professional. If you're unsure about any aspect of the process, or if you're not comfortable working with electricity, it may be best to hire a professional from Locals4u for assistance.

READ MORE
blog1
27
Feb

Ceiling Light Installation

Installing a ceiling light can be done in a few simple steps:

  1. Turn off the power: Before you begin, turn off the power to the circuit you'll be working on. You can do this by switching off the circuit breaker or removing the fuse.

  2. Remove the old light fixture: If there's an existing light fixture, remove it by unscrewing the mounting bracket and disconnecting the wires.

  3. Install the mounting bracket: Attach the new mounting bracket to the electrical box using the screws provided.

  4. Connect the wires: Connect the wires from the electrical box to the wires on the light fixture, following the manufacturer's instructions. Typically, this involves connecting the black or red wire to the black or red wire, the white wire to the white wire, and the green or bare wire to the green or bare wire.

  5. Attach the light fixture: Attach the light fixture to the mounting bracket using the screws provided.

  6. Install the light bulbs: Install the light bulbs according to the manufacturer's instructions. Make sure not to exceed the maximum wattage listed on the fixture.

  7. Turn on the power: Once you're done, turn the power back on and test the light to ensure it's working correctly.

It's important to note that electrical work can be dangerous and should only be done by a qualified professional. If you're unsure about any aspect of the process, or if you're not comfortable working with electricity, it may be best to hire a professional from Locals4u for assistance.

READ MORE
blog1
27
Feb

Fan Repair

Repairing a fan can depend on the type of fan and the issue it's experiencing. However, here are some general steps that can help you repair a fan:

  1. Turn off the power: Before you begin, turn off the power to the circuit you'll be working on. You can do this by switching off the circuit breaker or removing the fuse.

  2. Identify the issue: Determine what's wrong with the fan. Is it not turning on at all, making strange noises, or not blowing air as it should? Once you identify the issue, you can better determine how to repair it.

  3. Clean the fan: Sometimes, a dirty or dusty fan can cause issues. Use a soft brush or cloth to clean the blades and motor housing. Make sure the fan is completely dry before turning it back on.

  4. Tighten loose parts: If the fan is making rattling or clanking noises, it may have loose parts. Use a screwdriver or wrench to tighten any loose screws or bolts.

  5. Replace worn or broken parts: If any parts are worn or broken, such as the motor, blades, or bearings, you may need to replace them. Check the manufacturer's instructions or contact customer support for replacement parts.

  6. Check the capacitor: If the fan is not turning on at all, the capacitor may be faulty. You can test the capacitor using a multimeter or contact a professional for help.

  7. Test the fan: Once you've made any necessary repairs, turn the power back on and test the fan to ensure it's working correctly.

It's important to note that electrical work can be dangerous and should only be done by a qualified professional. If you're unsure about any aspect of the process, or if you're not comfortable working with electricity, it may be best to hire a professional from Locals4u for assistance.


READ MORE
blog1
27
Feb

Fan Replacement

Replacing a fan can depend on the type of fan and the device it's installed in. However, here are some general steps that can help you replace a fan:

  1. Turn off the power: Before you begin, turn off the power to the circuit you'll be working on. You can do this by switching off the circuit breaker or removing the fuse.

  2. Remove the old fan: If the fan is mounted on a ceiling or wall, use a screwdriver to remove the screws that hold it in place. If the fan is a table or floor fan, unplug it from the power source.

  3. Check the electrical box: Make sure the electrical box can support the weight of the new fan and is rated for ceiling fan installation. If it's not, you'll need to install a new electrical box.

  4. Install the new fan: If the fan is a ceiling or wall mount, attach the mounting bracket to the electrical box using the screws provided. Connect the wires from the new fan to the wires in the electrical box, following the manufacturer's instructions. Attach the fan blades to the motor housing using the screws provided. If the fan is a table or floor fan, simply plug in the new fan to the power source.

  5. Test the new fan: Once you're done, turn the power back on and test the new fan to ensure it's working correctly.

It's important to note that electrical work can be dangerous and should only be done by a qualified professional. If you're unsure about any aspect of the process, or if you're not comfortable working with electricity, it may be best to hire a professional from Locals4u for assistance.

READ MORE
blog1
27
Feb

Decorative Ceiling Fan Installation

Installing a decorative ceiling fan is similar to installing a regular ceiling fan. Here are the general steps:

  1. Choose the location: Decide where you want to install the fan. It should be at least 7 feet above the floor and away from any obstructions.

  2. Check the electrical box: Make sure the electrical box can support the weight of the fan and is rated for ceiling fan installation. If it's not, you'll need to install a new electrical box.

  3. Turn off the power: Turn off the power to the circuit you'll be working on.

  4. Install the mounting bracket: Attach the mounting bracket to the electrical box using the screws provided.

  5. Attach the downrod: Connect the downrod to the mounting bracket using the provided screws.

  6. Wire the fan: Follow the manufacturer's instructions to connect the wires from the fan to the wires in the electrical box. Typically, this involves connecting the black or red wire to the black or red wire, the white wire to the white wire, and the green or bare wire to the green or bare wire.

  7. Attach the fan blades: Attach the fan blades to the motor housing using the screws provided.

  8. Install the light kit (if applicable): If your fan has a light kit, attach it to the bottom of the motor housing using the screws provided.

  9. Install the light bulbs: If your fan has a light kit, install the light bulbs.

  10. Install the decorative elements: Decorative ceiling fans often come with additional elements, such as a canopy, blade brackets, or light fixture covers. Follow the manufacturer's instructions to install these elements.

  11. Turn on the power: Turn on the power and test the fan to make sure it's working correctly.

It's important to note that electrical work can be dangerous and should only be done by a qualified professional. If you're unsure about any aspect of the process, or if you're not comfortable working with electricity, it may be best to hire a professional from Locals4u for assistance.

READ MORE
blog1
27
Feb

Fan Installation

Here are the general steps to install a fan:

  1. Choose the location: Decide where you want to install the fan. It should be at least 7 feet above the floor and away from any obstructions.

  2. Check the electrical box: Make sure the electrical box can support the weight of the fan and is rated for ceiling fan installation. If it's not, you'll need to install a new electrical box.

  3. Turn off the power: Turn off the power to the circuit you'll be working on.

  4. Install the mounting bracket: Attach the mounting bracket to the electrical box using the screws provided.

  5. Attach the downrod: Connect the downrod to the mounting bracket using the provided screws.

  6. Wire the fan: Follow the manufacturer's instructions to connect the wires from the fan to the wires in the electrical box. Typically, this involves connecting the black or red wire to the black or red wire, the white wire to the white wire, and the green or bare wire to the green or bare wire.

  7. Attach the fan blades: Attach the fan blades to the motor housing using the screws provided.

  8. Turn on the power: Turn on the power and test the fan to make sure it's working correctly.

It's important to note that electrical work can be dangerous and should only be done by a qualified professional. If you're unsure about any aspect of the process, or if you're not comfortable working with electricity, it may be best to hire a professional from Locals4u for assistance.

READ MORE
blog1
27
Feb

Fan Regulator Installation

Here are the general steps for installing a fan regulator:

  1. Turn off the power: Before you begin, turn off the power to the circuit you'll be working on. You can do this by switching off the circuit breaker or removing the fuse.

  2. Identify the wires: Use a voltage tester to identify the wires that supply power to the fan. The wires may be labeled or color-coded for easy identification.

  3. Remove the old switch: If there is an existing switch or regulator for the fan, you'll need to remove it. Use a screwdriver to remove the screws that hold the switch in place.

  4. Connect the new regulator: Connect the wires from the fan to the corresponding terminals on the new regulator. Typically, the regulator will have three terminals labeled "common," "high," and "low." The wire from the fan's motor should be connected to the "common" terminal, while the wires from the power supply should be connected to the "high" and "low" terminals.

  5. Secure the regulator: Once the wires are connected, secure the regulator to the electrical box using screws or the provided mounting bracket.

  6. Install the cover plate: Attach the cover plate to the regulator using the screws provided.

  7. Turn the power back on: Once you're done, turn the power back on and test the regulator to ensure it's working correctly.

It's important to note that electrical work can be dangerous and should only be done by a qualified professional. If you're unsure about any aspect of the process, or if you're not comfortable working with electricity, it may be best to hire a professional from Locals4u for assistance.

READ MORE
blog1
27
Feb

Switch Replacement

Replacing a switch depends on the type of switch and the device it's installed in. However, here are some general steps that can help you replace a switch:

  1. Turn off the power: Before you begin, turn off the power to the circuit you'll be working on. You can do this by switching off the circuit breaker or removing the fuse.

  2. Remove the switch cover plate: Using a screwdriver, remove the screws that hold the switch cover plate in place.

  3. Unscrew the switch: Use a screwdriver to unscrew the screws that hold the switch in place.

  4. Remove the wires from the switch: Carefully pull the wires out of the switch, taking note of which wire goes where. You may need to use pliers to loosen the wire nuts.

  5. Install the new switch: Connect the wires to the new switch, using the same configuration as the old switch. Tighten the wire nuts and screw the switch back into place.

  6. Replace the cover plate: Screw the cover plate back into place.

  7. Turn the power back on: Once you're done, turn the power back on and test the switch to ensure it's working correctly.

It's important to note that electrical work can be dangerous and should only be done by a qualified professional. If you're unsure about any aspect of the process, or if you're not comfortable working with electricity, it may be best to hire a professional from Locals4u for assistance.

READ MORE
blog1
27
Feb

Socket Replacement

Replacing a socket can be a relatively straightforward task, but it does require some basic electrical knowledge and the right tools. Here are some general steps to replace a socket:

  1. Turn off power: Before starting any electrical work, turn off the power supply to the socket you will be replacing by switching off the corresponding circuit breaker.

  2. Remove the old socket: Use a screwdriver to remove the screws holding the old socket in place. Pull the socket gently out of the wall, being careful not to touch the wires connected to it.

  3. Identify the wires: Take note of the wiring on the old socket. The wires are usually color-coded, with black or red for the hot wire, white or gray for the neutral wire, and green or bare for the ground wire. If you're not sure which wires are which, you can use a voltage tester to check.

  4. Connect the new socket: Connect the wires to the new socket by loosening the screws on the terminals, wrapping the wire around the screw, and then tightening the screw to secure the wire. Make sure you connect the wires to the correct terminals.

  5. Attach the new socket: Once the wires are connected, push the new socket back into the wall and secure it with screws.

  6. Test the socket: Turn the power back on and test the socket with a voltage tester or by plugging in a device to make sure it's working correctly.

It's important to note that electrical work can be dangerous if you're not familiar with it. If you're unsure about any aspect of replacing a socket, it may be best to hire a professional from Locals4u for assistance. Additionally, always ensure that you follow proper safety precautions and turn off the power supply before starting any electrical work.

READ MORE
blog1
27
Feb

Switchboard Repair

The repair of a switchboard may vary depending on the specific type of switchboard and the issue that needs to be addressed. However, here are some general steps that can guide you through the repair process:

  1. Identify the issue: Before starting any repair work, you need to identify the issue with the switchboard. This may include problems such as a circuit breaker not tripping, a switch not working, or a burnt-out component.

  2. Turn off power: Turn off the power supply to the switchboard to prevent any electrical accidents while repairing the switchboard.

  3. Inspect the switchboard: Inspect the switchboard for any visible signs of damage such as burns, loose wires, or broken components. Make a note of any issues that you find.

  4. Replace damaged components: If you find any damaged components, such as a burnt-out circuit breaker or a broken switch, replace them with new ones. Follow the manufacturer's instructions for proper replacement.

  5. Tighten loose connections: Check for any loose connections and tighten them using a screwdriver or pliers.

  6. Repair damaged wires: If any wires are damaged or broken, cut them and strip the insulation off the ends. Then, connect them back to their respective terminals.

  7. Test the switchboard: After repairing the switchboard, turn on the power supply and test the switchboard to ensure that everything is working correctly.

It's important to note that switchboard repair can be dangerous if you are not familiar with electrical work. If you are unsure about any aspect of the repair,it may be best to hire a professional from Locals4u for assistance. Additionally, always ensure that you follow the manufacturer's instructions and take all necessary safety precautions to prevent accidents.

READ MORE
blog1
27
Feb

Ac Switchbox Installation

The installation of an AC switchbox may vary depending on the specific model and manufacturer. However, here are some general steps that can guide you through the installation process:

  1. Choose the location: Select a suitable location for the AC switchbox that is easily accessible and has enough space to accommodate it.

  2. Gather materials: Make sure you have all the necessary materials and tools for installation. This may include the AC switchbox, mounting brackets, screws, cables, wire strippers, and a screwdriver.

  3. Turn off power: Turn off the power supply to the area where you will be installing the AC switchbox. This is essential to ensure your safety during installation.

  4. Install the mounting brackets: Depending on the type of AC switchbox, you may need to install mounting brackets first. Follow the manufacturer's instructions to attach the brackets securely to the wall.

  5. Connect the wires: Connect the incoming power wires to the AC switchbox's main circuit breaker. Follow the manufacturer's instructions carefully to ensure that the wires are connected properly.

  6. Connect other wires: Connect the other wires to their respective terminals in the AC switchbox. These wires may include branch circuit wires, neutral wires, and grounding wires.

  7. Install the AC unit: Once the AC switchbox is installed, mount the AC unit on top of it. Follow the manufacturer's instructions to connect the AC unit to the switchbox and secure it in place.

  8. Test the AC unit: Once everything is connected, turn on the power supply and test the AC unit to ensure that it is working correctly. If there are any issues, turn off the power supply and troubleshoot the problem.

  9. Close the AC switchbox: After testing is complete, close the AC switchbox's cover and secure it with screws.

It's important to note that AC switchbox installation can be dangerous if you are not familiar with electrical work. If you are unsure about any aspect of the installation, it may be best to hire a professional from Locals4u for assistance.

READ MORE
blog1
27
Feb

Switchboard Installation

Switchboard installation can vary depending on the specific type of switchboard you are installing, but here are some general steps:

  1. Choose the location: Select a suitable location for the switchboard that is easily accessible and has enough space to accommodate the switchboard.

  2. Gather materials: Make sure you have all the necessary materials and tools for installation. This may include the switchboard, mounting brackets, screws, cables, wire strippers, and a screwdriver.

  3. Turn off power: Turn off the power supply to the area where you will be installing the switchboard. This is essential to ensure your safety during installation.

  4. Install the mounting brackets: Depending on the type of switchboard, you may need to install mounting brackets first. Follow the manufacturer's instructions to attach the brackets securely to the wall.

  5. Connect the wires: Connect the incoming power wires to the switchboard's main circuit breaker. Follow the manufacturer's instructions carefully to ensure that the wires are connected properly.

  6. Connect other wires: Connect the other wires to their respective terminals in the switchboard. These wires may include branch circuit wires, neutral wires, and grounding wires.

  7. Test the switchboard: Once all the wires are connected, turn on the power supply and test the switchboard to ensure that everything is working correctly. If there are any issues, turn off the power supply and troubleshoot the problem.

  8. Close the switchboard: After testing is complete, close the switchboard's cover and secure it with screws.

  9. Label the switchboard: Finally, label the switchboard so that it is easy to identify and understand which circuits are controlled by which breakers.

It's important to note that switchboard installation can be dangerous if you are not familiar with electrical work. If you are unsure about any aspect of the installation, it may be best to hire a professional from Locals4u for assistance.

READ MORE
blog1
24
Feb

Tutorials And How To Guides

Tutorials and How-to guides are probably the simplest type of blog post you can work on. They are easy because they involve you talking about things you are already familiar with such as your product or service.

The most important thing when it comes to how-to guides is to break down your tutorial into the smallest steps and into the simplest terms. Don’t assume your readers know what they’re doing — this is a tutorial, remember?

READ MORE